
The press up one of the best bodyweight exercises we can do, hitting the upper body “push” muscles like no other. However, while it comes naturally to some, for others it takes a little work before the reps are being cranked out. So where do we start if we’re in the latter group?
By the principle of specificity, doing movements or exercises that are similar to what we want to achieve will yield the greatest carryover (gains). While we might not be able to do a full press up, we can do less challenging movements that are similar, and use them to build up our pressing strength - as they will use the same muscles and require a similar level of neuromuscular coordination. As we get stronger, we use more challenging movements until we achieve our goal - the full press up.
Progress is made not by focusing on what we can’t do, but on what we can do, and doing it!
So to start, we need to find what we can do. Below are a list of 8 pushing exercises that get progressively more difficult, culminating in the full press up. Think of these as levels, and find which you can do with ease and which are more challenging. Once you find your most challenging level (can perform only 1-8 reps, next level up is too difficult), aim to build up the reps you can do in this exercise, and use the exercises from earlier levels as additional work to build more strength.

When you can do 10-15 of your challenging exercise, move up to the next level and build up the reps again - using the now less challenging exercises as additional strength builders.
As with all bodyweight movements, sometimes coordination is the biggest issue and not muscle force. As such, you may find that one day it “just clicks” out of the blue and you smash through the levels in rapid succession - in which case, do so! Or the opposite, and it takes a few sessions before you make big progress - in which case, do so! Stick at it, keep refining your technique and focusing on improvement, and you’ll make it. To help with technique refinement, I’ve popped 4 top tips for press up technique at the end of this blog post. While most applicable the full press up, they can be applied to all levels.
PRESS UP LEVELS
Level 1: Knee Incline Press Ups
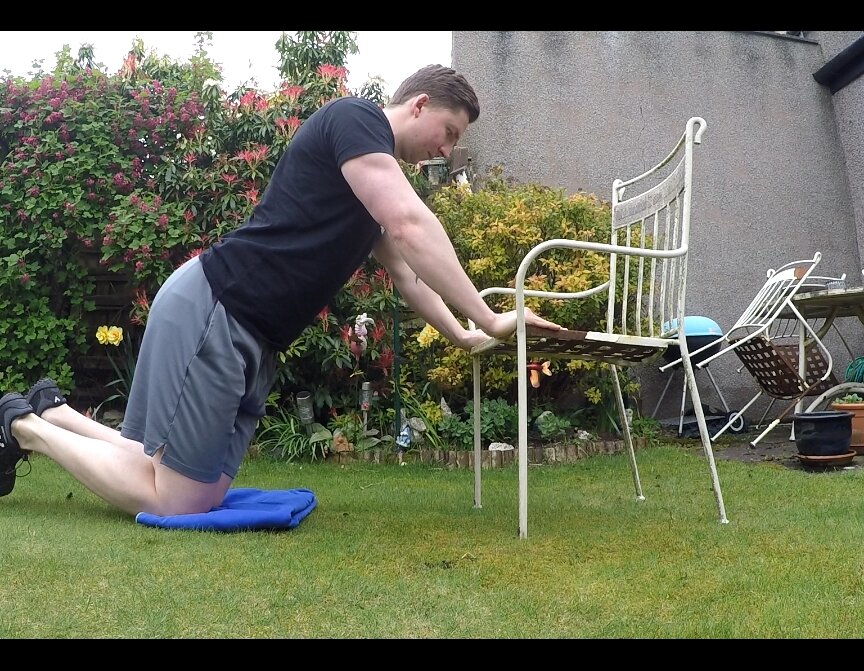
Pop into a kneeling incline press up position (on your hands and knees, hands about shoulder width apart and holding a raised stable surface - a chair, table etc - arms extended, torso held straight, knees on the floor) and bend your elbows to bring your chest towards the raised surface. Once you are about an inch or two away, extend your arms to return to the starting position.
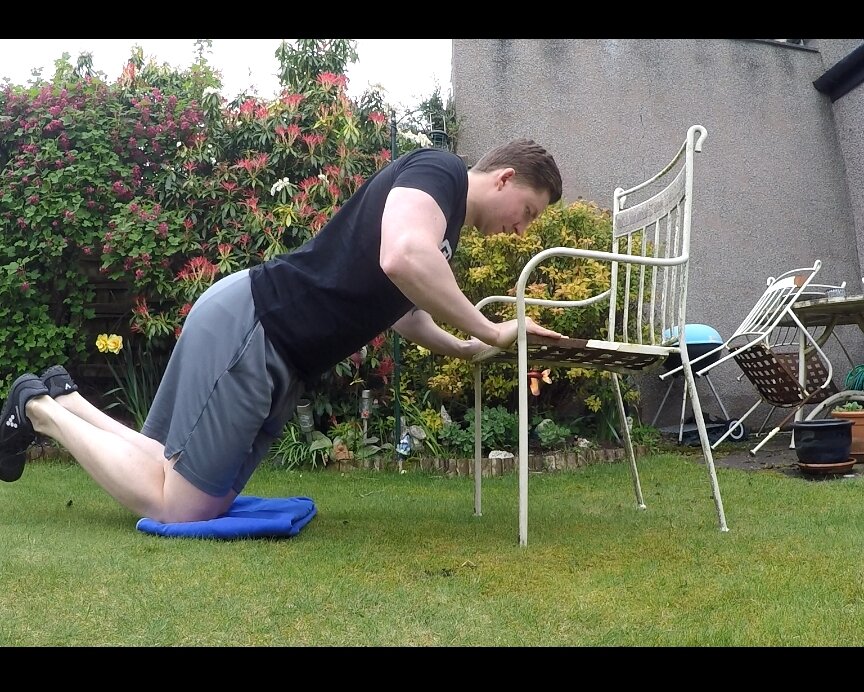
Level 2: Full Incline Press Up Negatives


Get into a full incline press up position (arms extended, hands about shoulder width apart on a stable raised surface, legs extended, feet together, body held in a straight line), and slowly bend your elbows to lower your body to the raised surface. We want to move slowly, continuously descending for a 6 second count (counting 6 Mississippi's, pink elephants or whatever you’d like) and land gently on the surface. Use your legs to get back up and into a full incline press up position, and repeat.
By moving in a slow and controlled manner, we can work the same muscles we’ll use for the press up - just in reverse. The slower we move, the harder the muscles have to work.
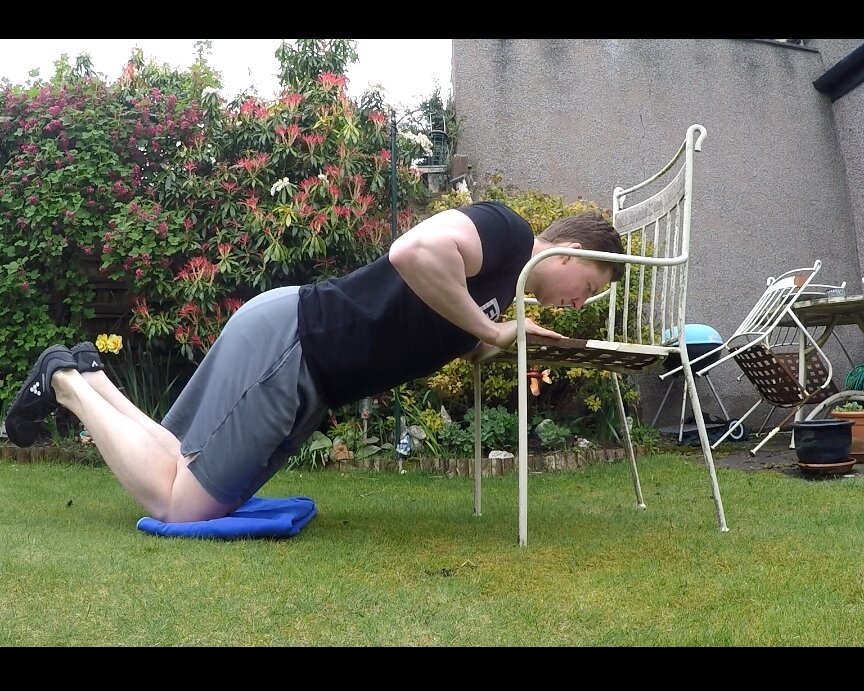
Level 3: Full Incline Press Up Pauses

Perform the Level 2 Full Incline Press Up Negative, but once you are an inch or two away from the surface, HOLD! Hover in this position for a 4 second count, then gently land before getting back into the start position.
This stretched muscle position at the end of the movement is the hardest part, so by spending some time here we can build strength in this position.
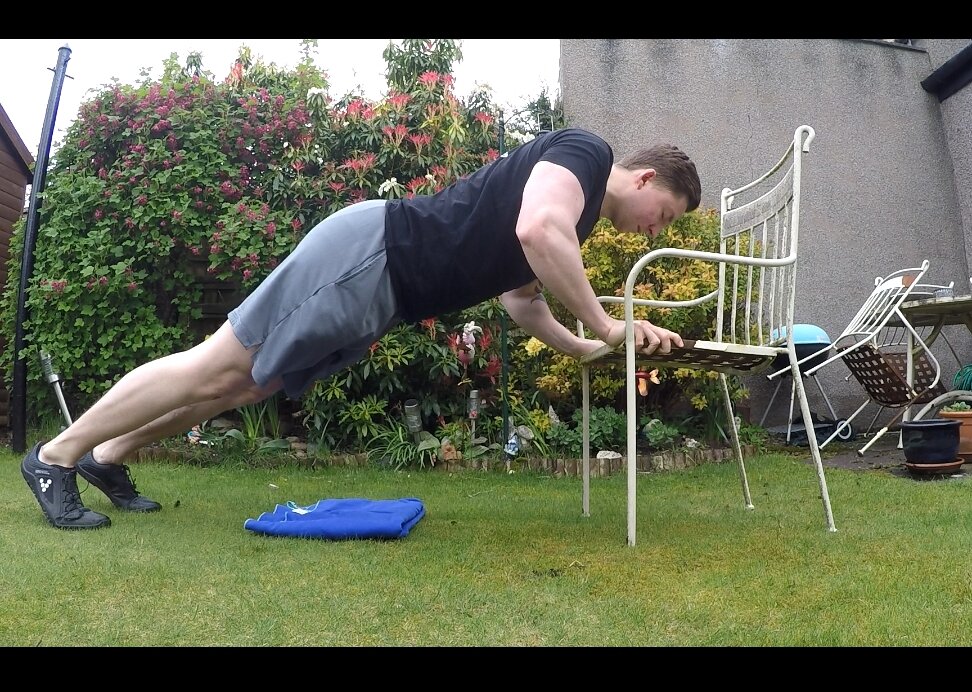
Level 4: Full Incline Press Ups

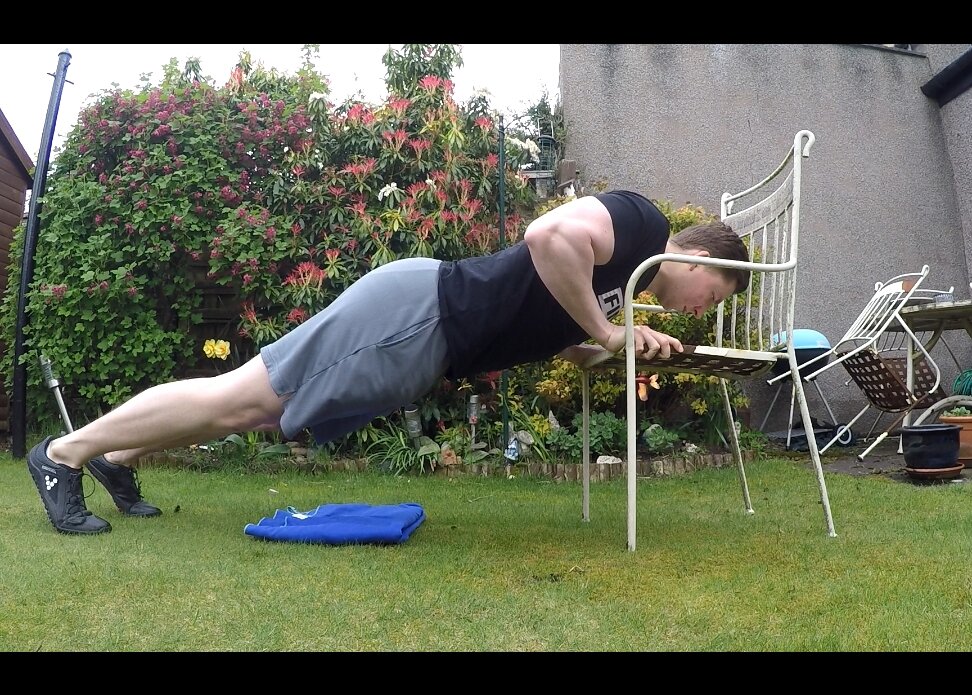

Get into a full incline press up position (arms extended, hands about shoulder width apart on a stable raised surface, legs extended, feet together, body held in a straight line), and slowly bend your elbows to lower your body to the raised surface. As soon as you’re an inch or two away from the surface, extend your arms to get back into the start position.
Level 5: Knee Press Ups
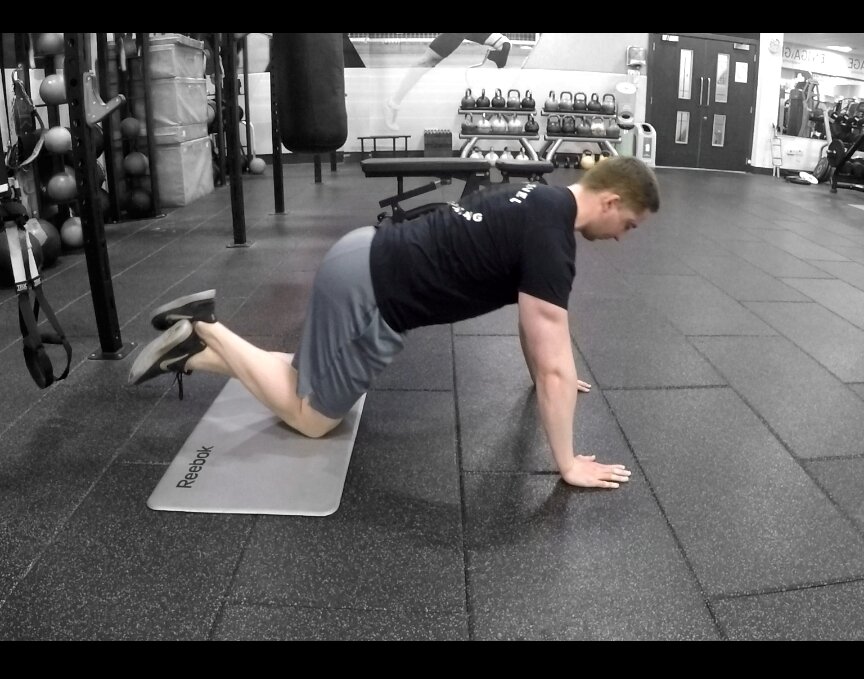
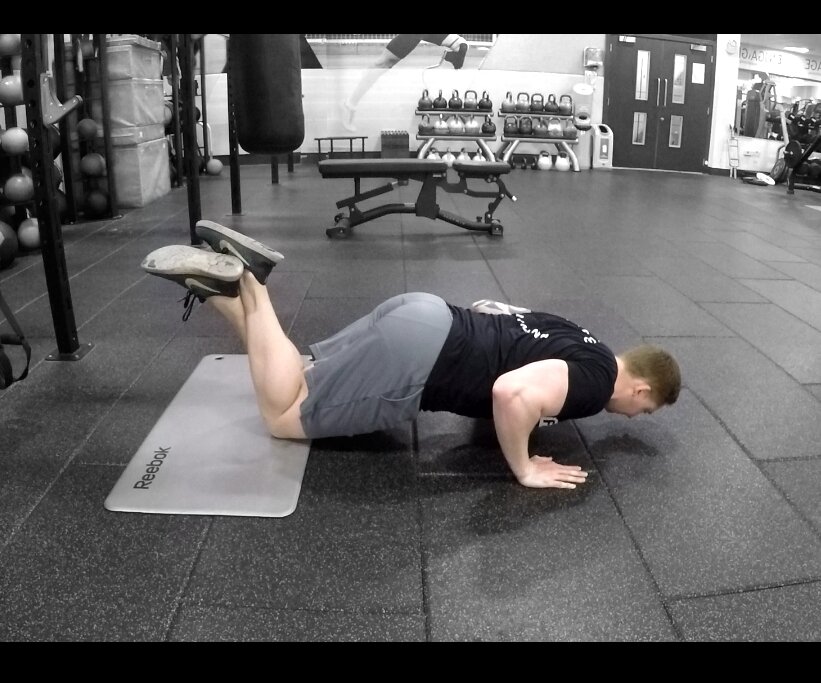
Pop into a kneeling press up position (on your hands and knees, hands about shoulder width apart, arms extended, torso held straight) and bend your elbows to bring your head and chest towards the floor. Once you are about an inch or two away, extend your arms to return to the starting position.
Level 6: Full Press Up Negatives


Assume the full press up position (arms extended, hands about shoulder width apart, legs extended, feet together, body held in a straight line), and slowly bend your elbows to lower your body to the ground. We want to move super slow, continuously descending for a 6 second count (I prefer Mississippi's but it’s your choice) and land gently on the ground. Get back up (rolling over, hands and knees, whatever it takes) and into a full press up position, and repeat.
By moving in a slow and controlled manner, we can work the same muscles we’ll use for the press up - just in reverse. The slower we move, the harder the muscles have to work.
Level 7: Full Press Up Pauses

Perform the Level 6 Full Press Up Negative, but once you are an inch or two away from the ground, HOLD! Hover in this position for a 4 second count, then gently land on the ground before getting back into the start position.
This stretched muscle position at the end of the movement is the hardest part, so by spending some time here we can build strength in this position. This will help us be ready to explode back up when we attempt full press ups.
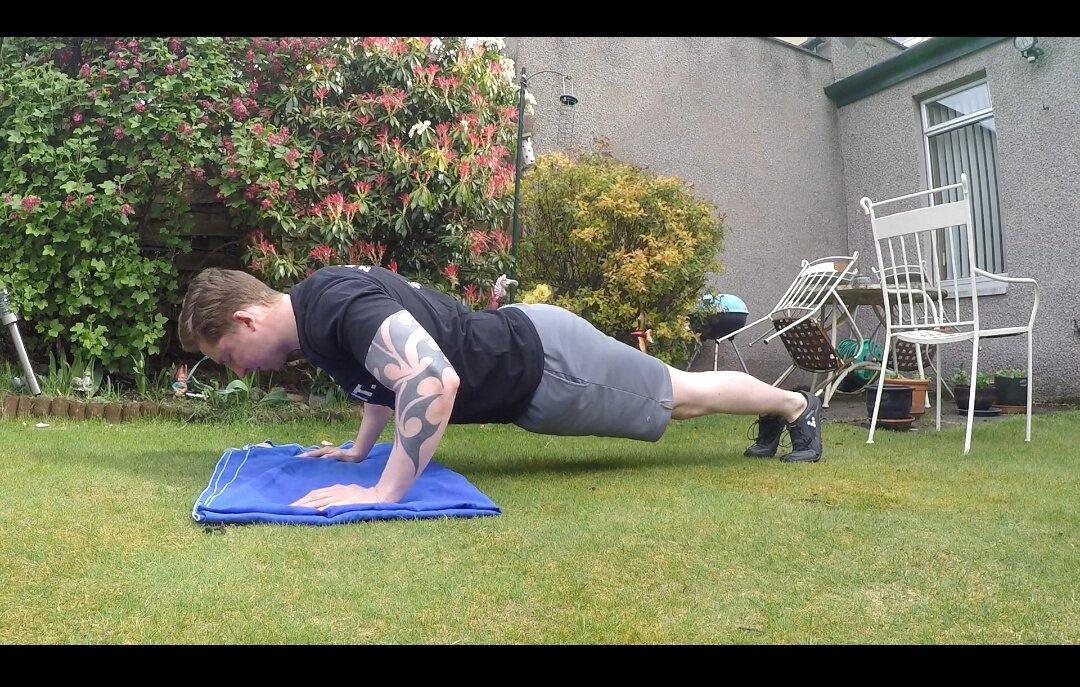
Level 8: Full Press Ups

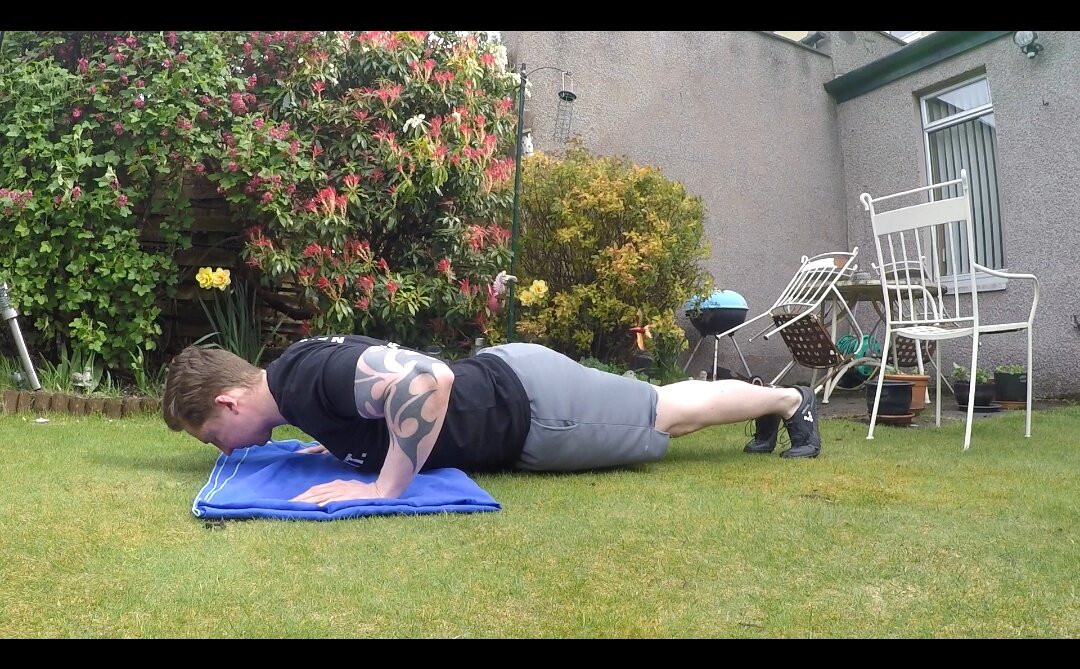
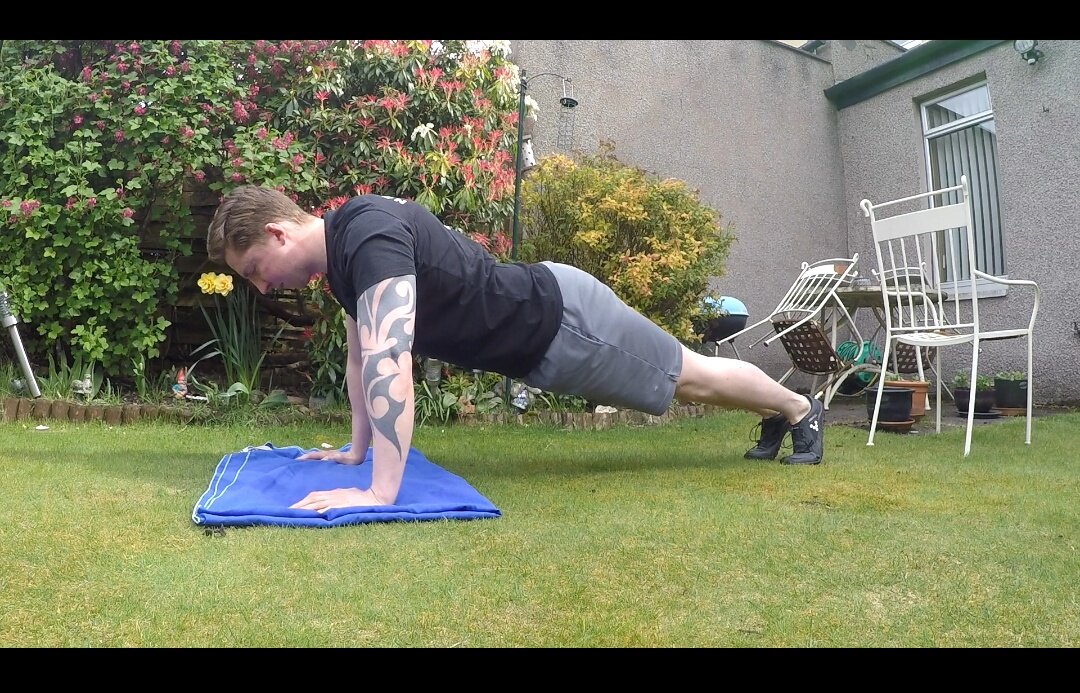
Get into the full press up position (arms extended, hands about shoulder width apart, legs extended, feet together, body held in a straight line), and bend your elbows to lower your body in a controlled manner. Keep the core tight, and once you’re an inch or two away from the ground, push the Earth away as hard as you can! Extend the arms to get back to the start position, and you have completed the press up.
Once we can do a full press up, we just need to work on building the reps. This can be done in the same fashion as any level - by doing what we can of the challenging movement (full press ups in this case), and then working on easier movements once the muscles are fatigued. This lets us continue to work and stimulate the muscles to get stronger, even though they are too tired to perform the challenging movement.
EXAMPLE WORKOUTS
When starting out, we want to avoid jumping in at the deep end and doing too much - so aim for 3-5 sessions per week, of 3-5 sets of exercises with 30-90 seconds rest between each set. It’s safe to do more in future, but we want to build a good foundation first.
We can add variety by adjusting the hand placement for wide, regular and close grip press ups, and that is what we’re gonna do here. So when you see Wide Grip Full Incline Press Up, for example, this just means perform Incline Full Press Ups with a slightly wider hand placement. This could be a couple of inches or a few hand spaces depending on what you feel is most comfortable. A wide grip will hit the chest muscles more, and a closer grip will hit the shoulders/arms more than the regular grip.


TOP TECHNIQUE TIPS
Less T, More A
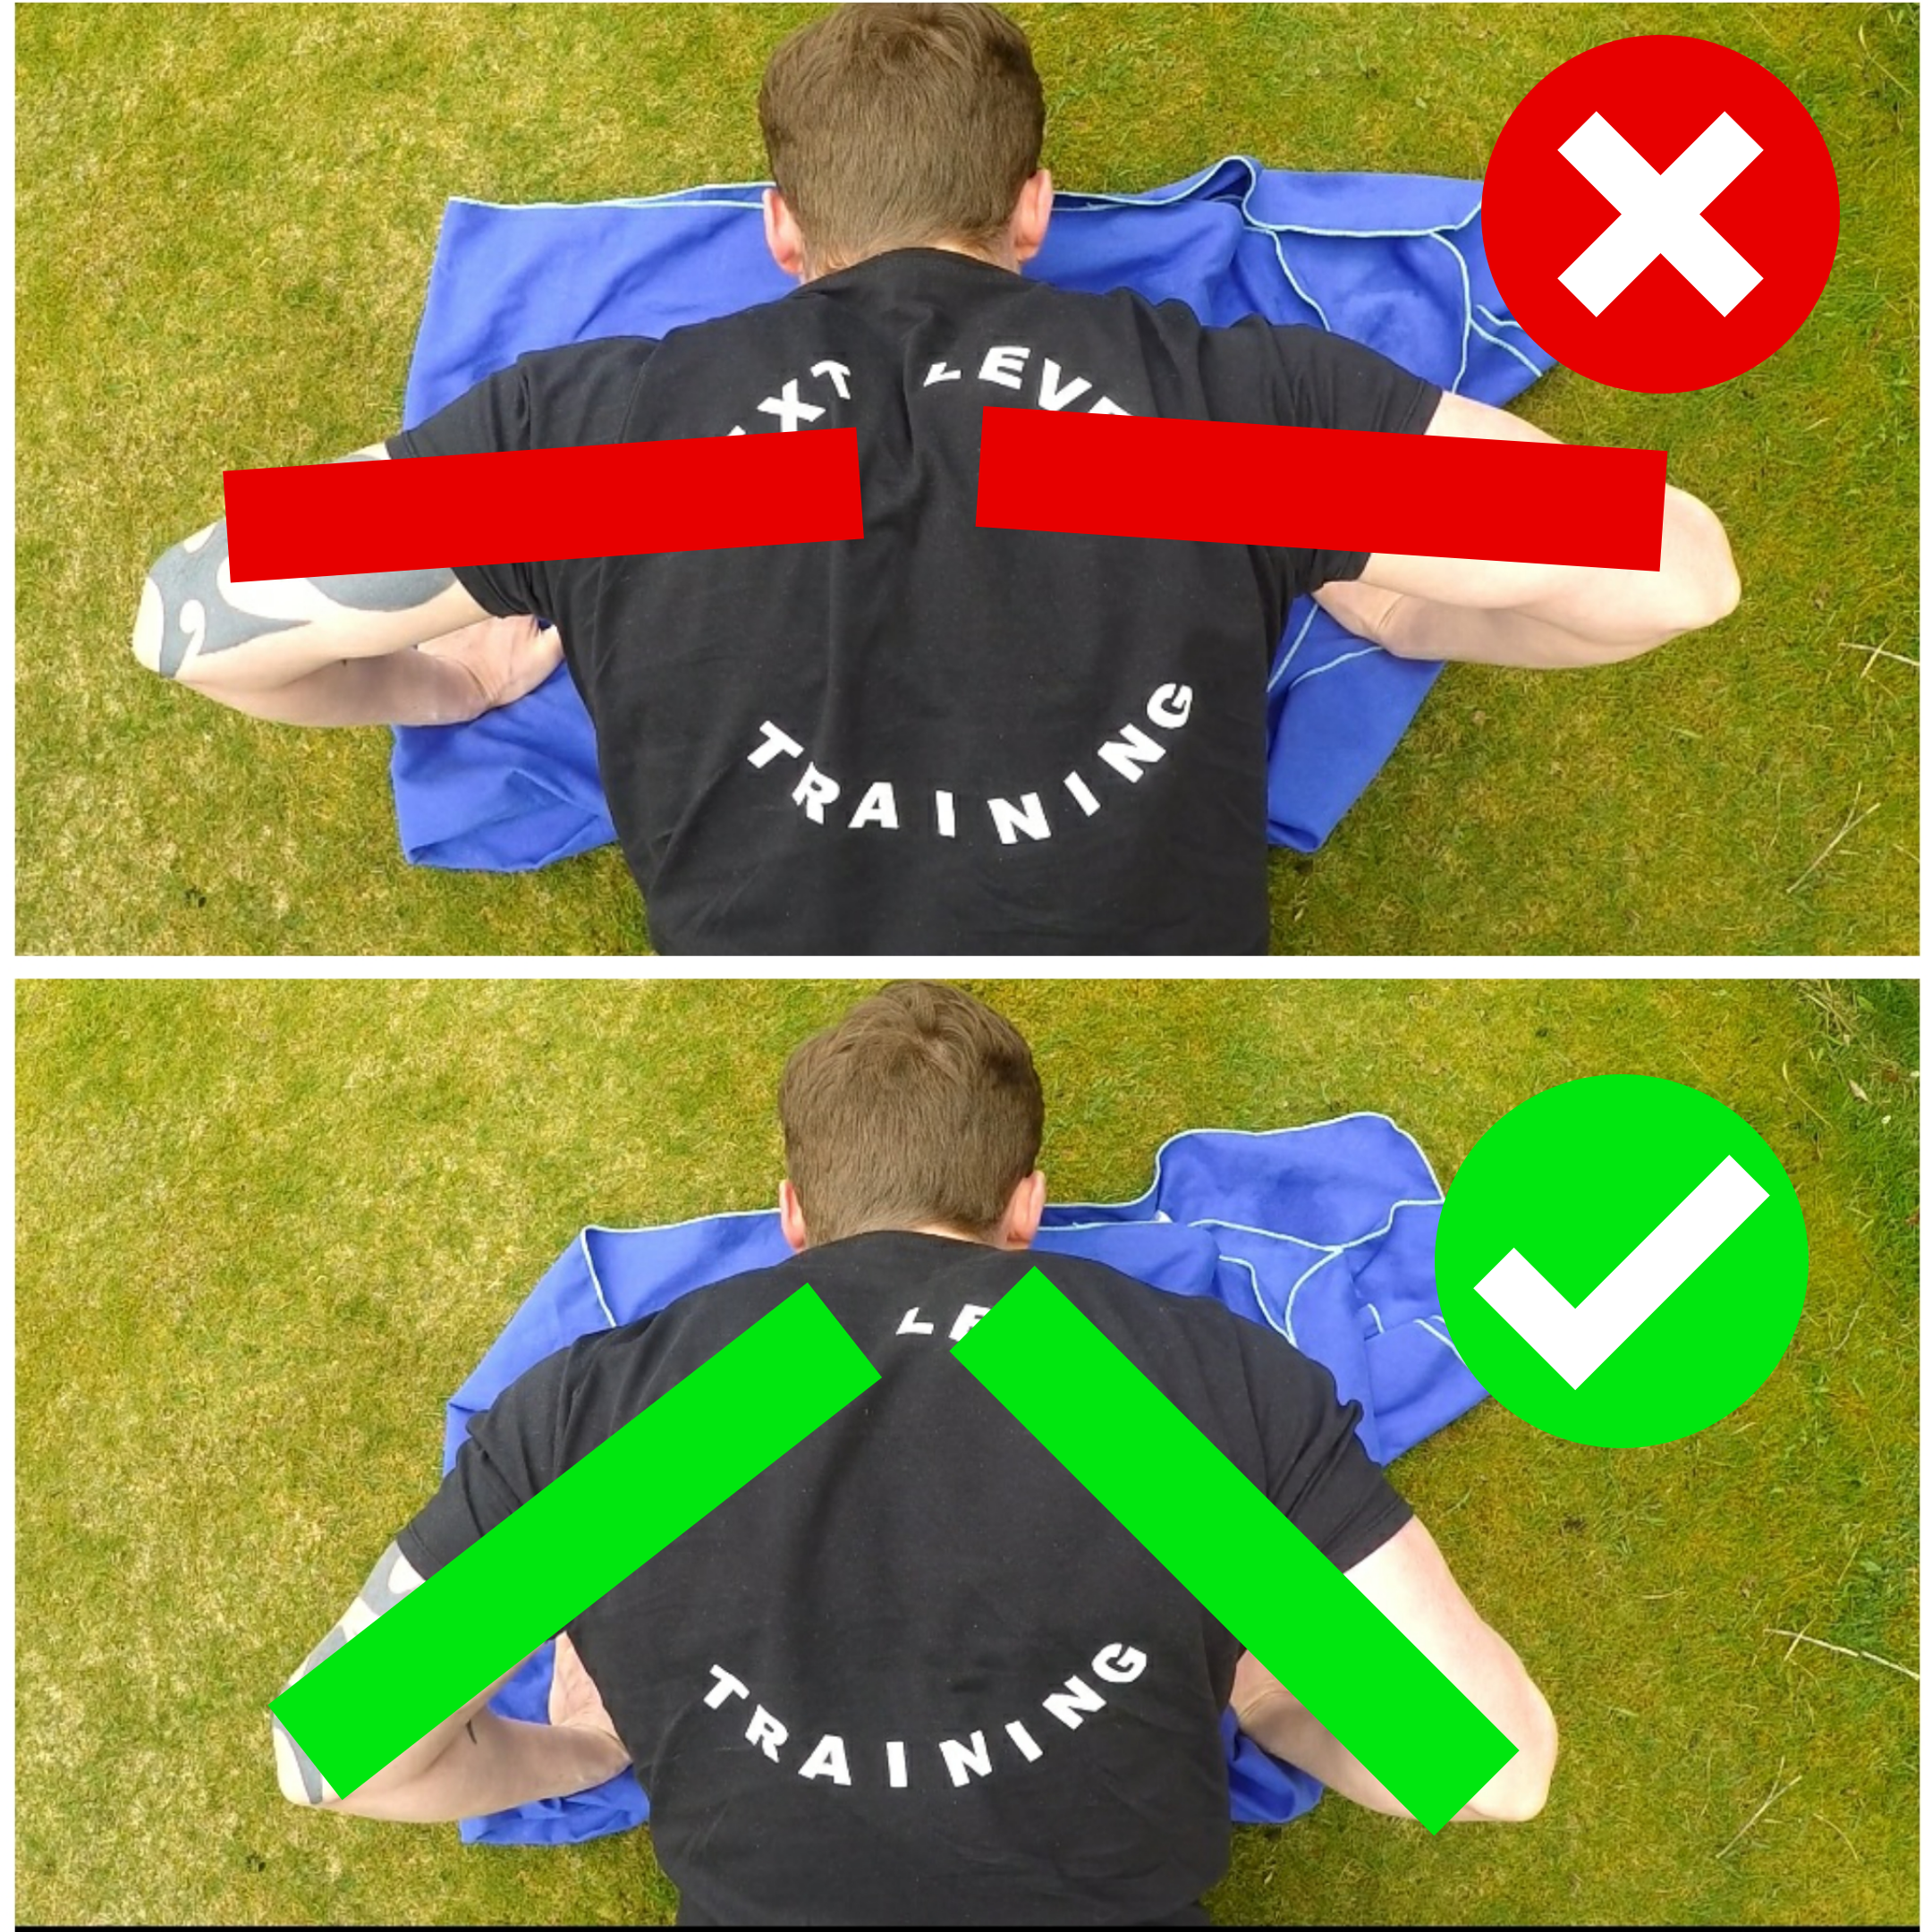
Flaring the elbows too much (creating a T shape) will force the shoulders to take over more work than they need to, limiting our pressing potential. To counter this, tuck the elbows slightly (bring them down closer to your body, creating more of an A shape) - spreading the work to your arms, chest and shoulders evenly, and creating a more stable shoulder position.
Good Posture
If we let our shoulders round forward when performing press ups, we’ll be putting our shoulders in a weaker/less stable position to press from. To counter this, bring the shoulders back and squeeze your shoulder blades together and down to keep them in a good position.
Press Ups, Not Head Bangers
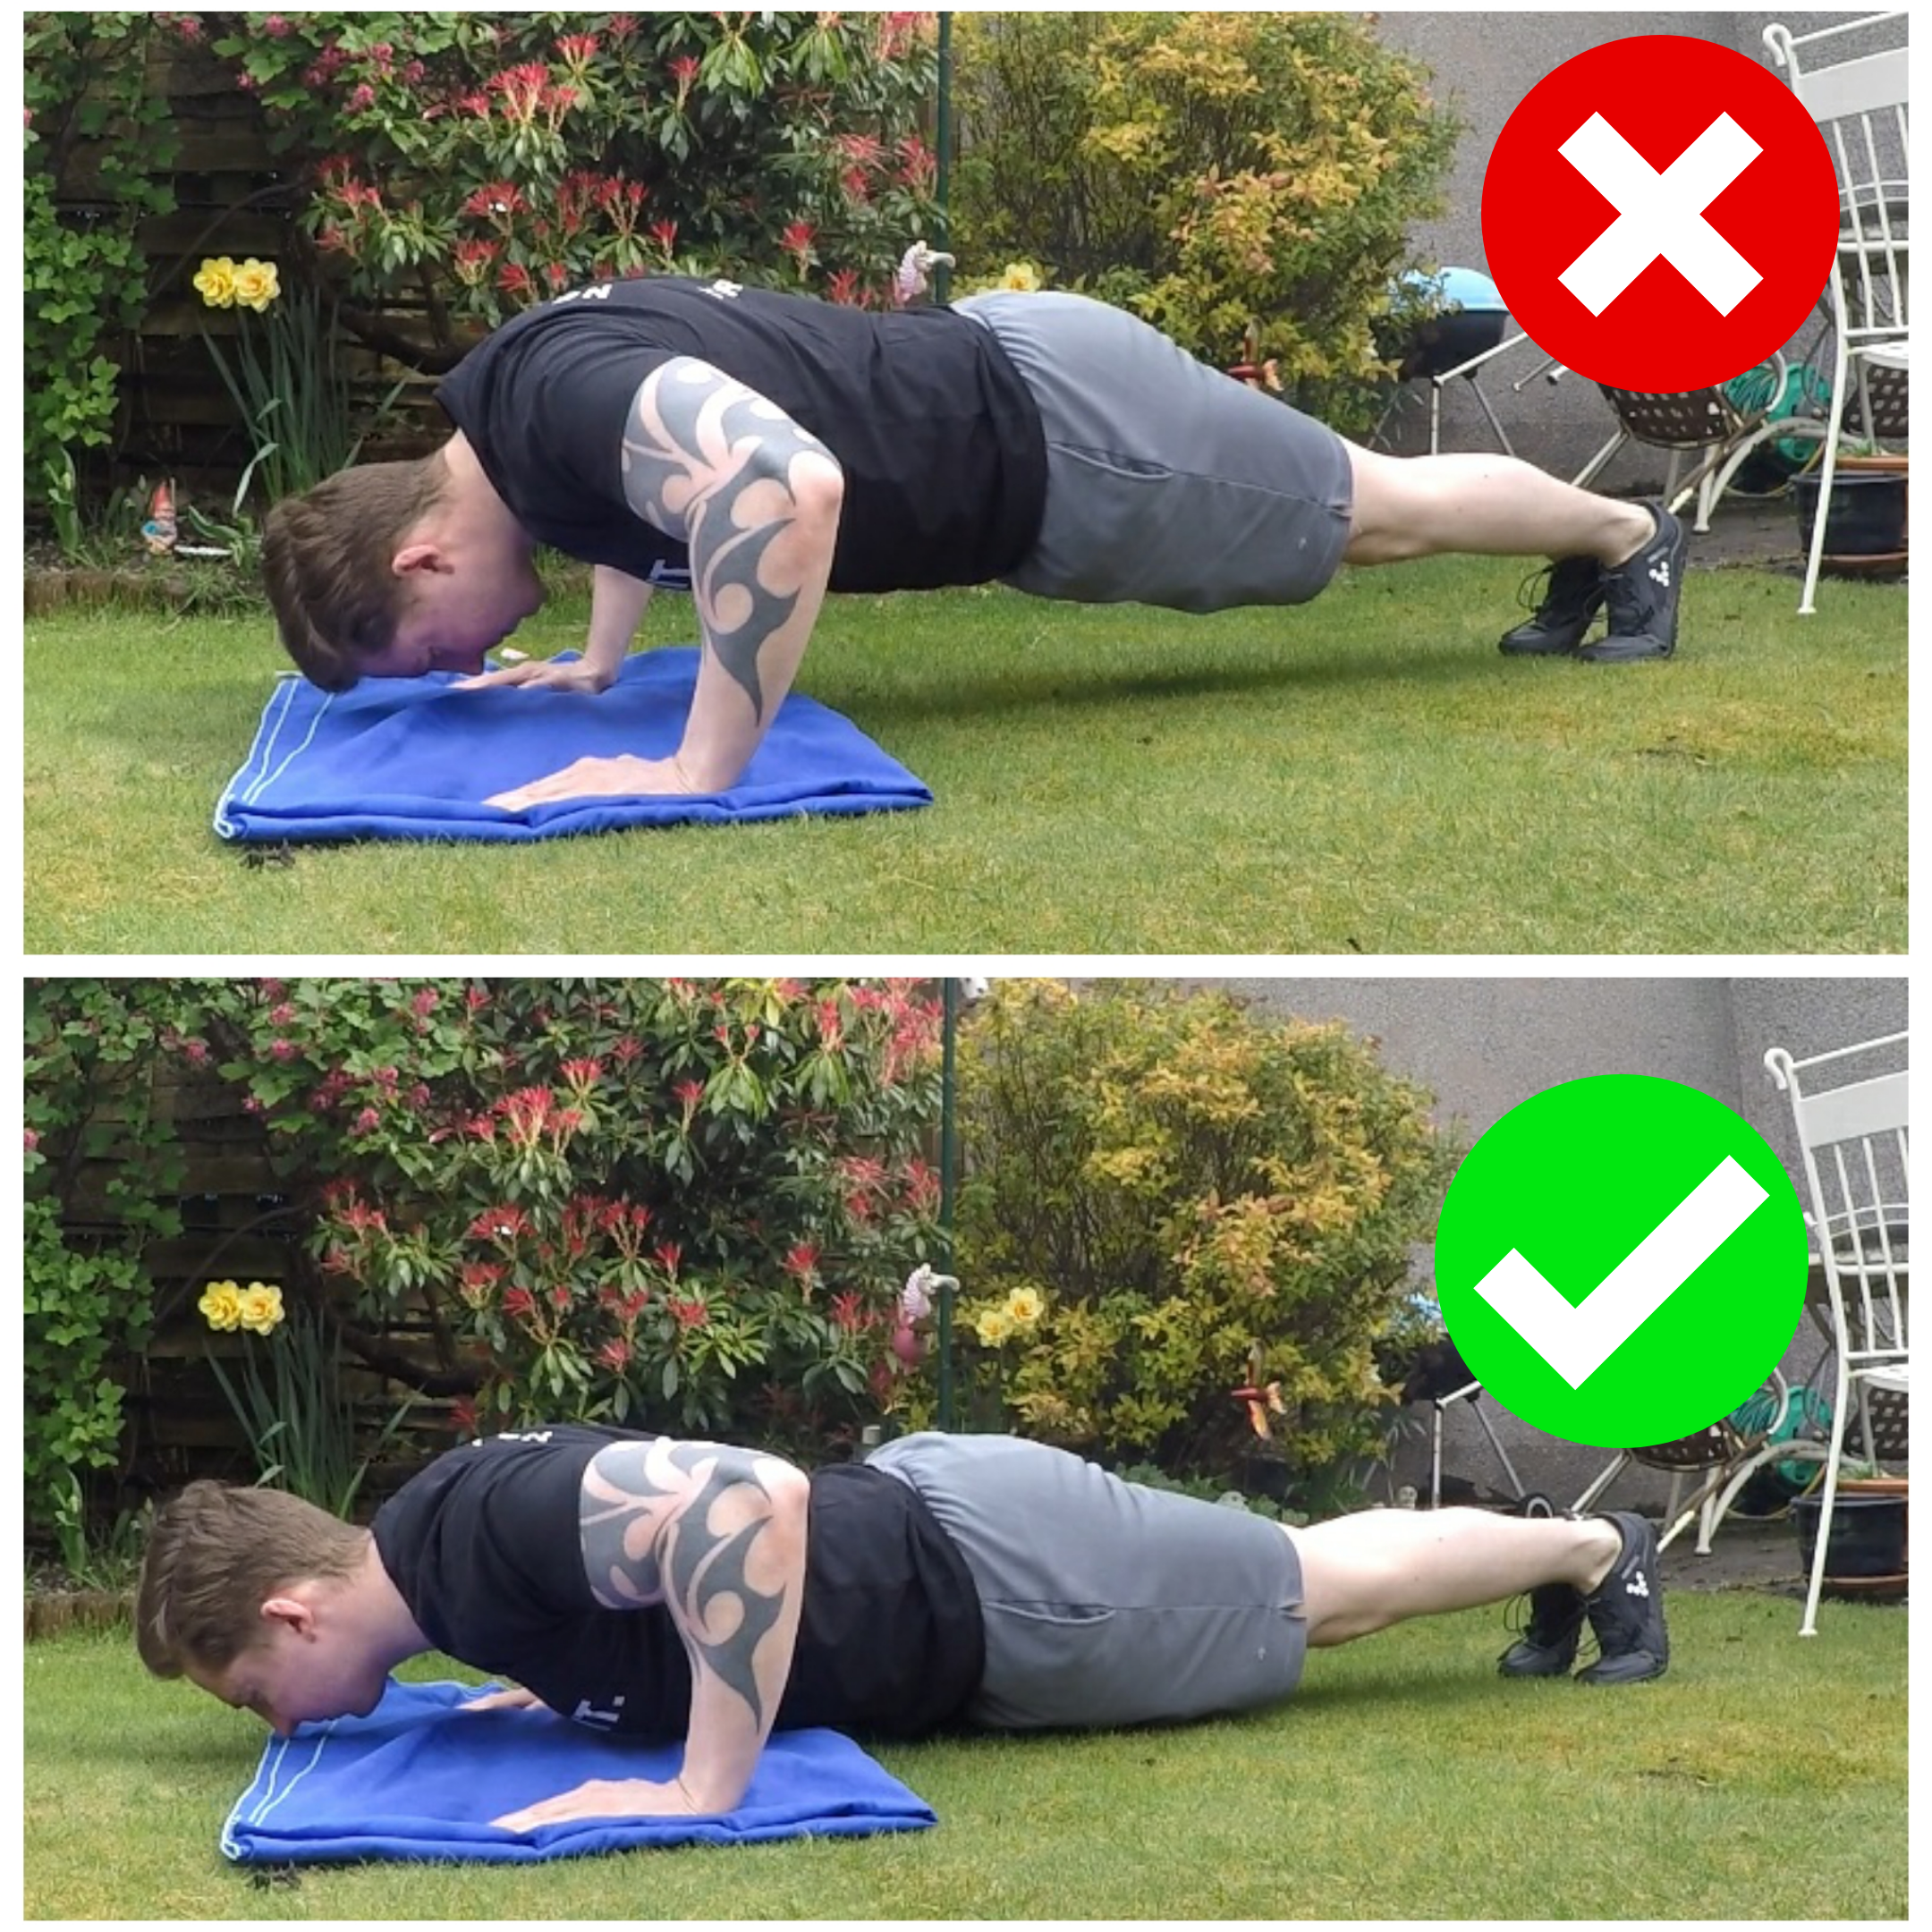
As we near the bottom of a press up, it is tempting to lean our head down to make it feel like we’re getting closer to the ground. Unfortunately, it’s just our head that’s getting lower, not our body - so we’re missing out on some strength building range of motion. To counter this, aim to keep your head in alignment with your spine and keep your body straight.
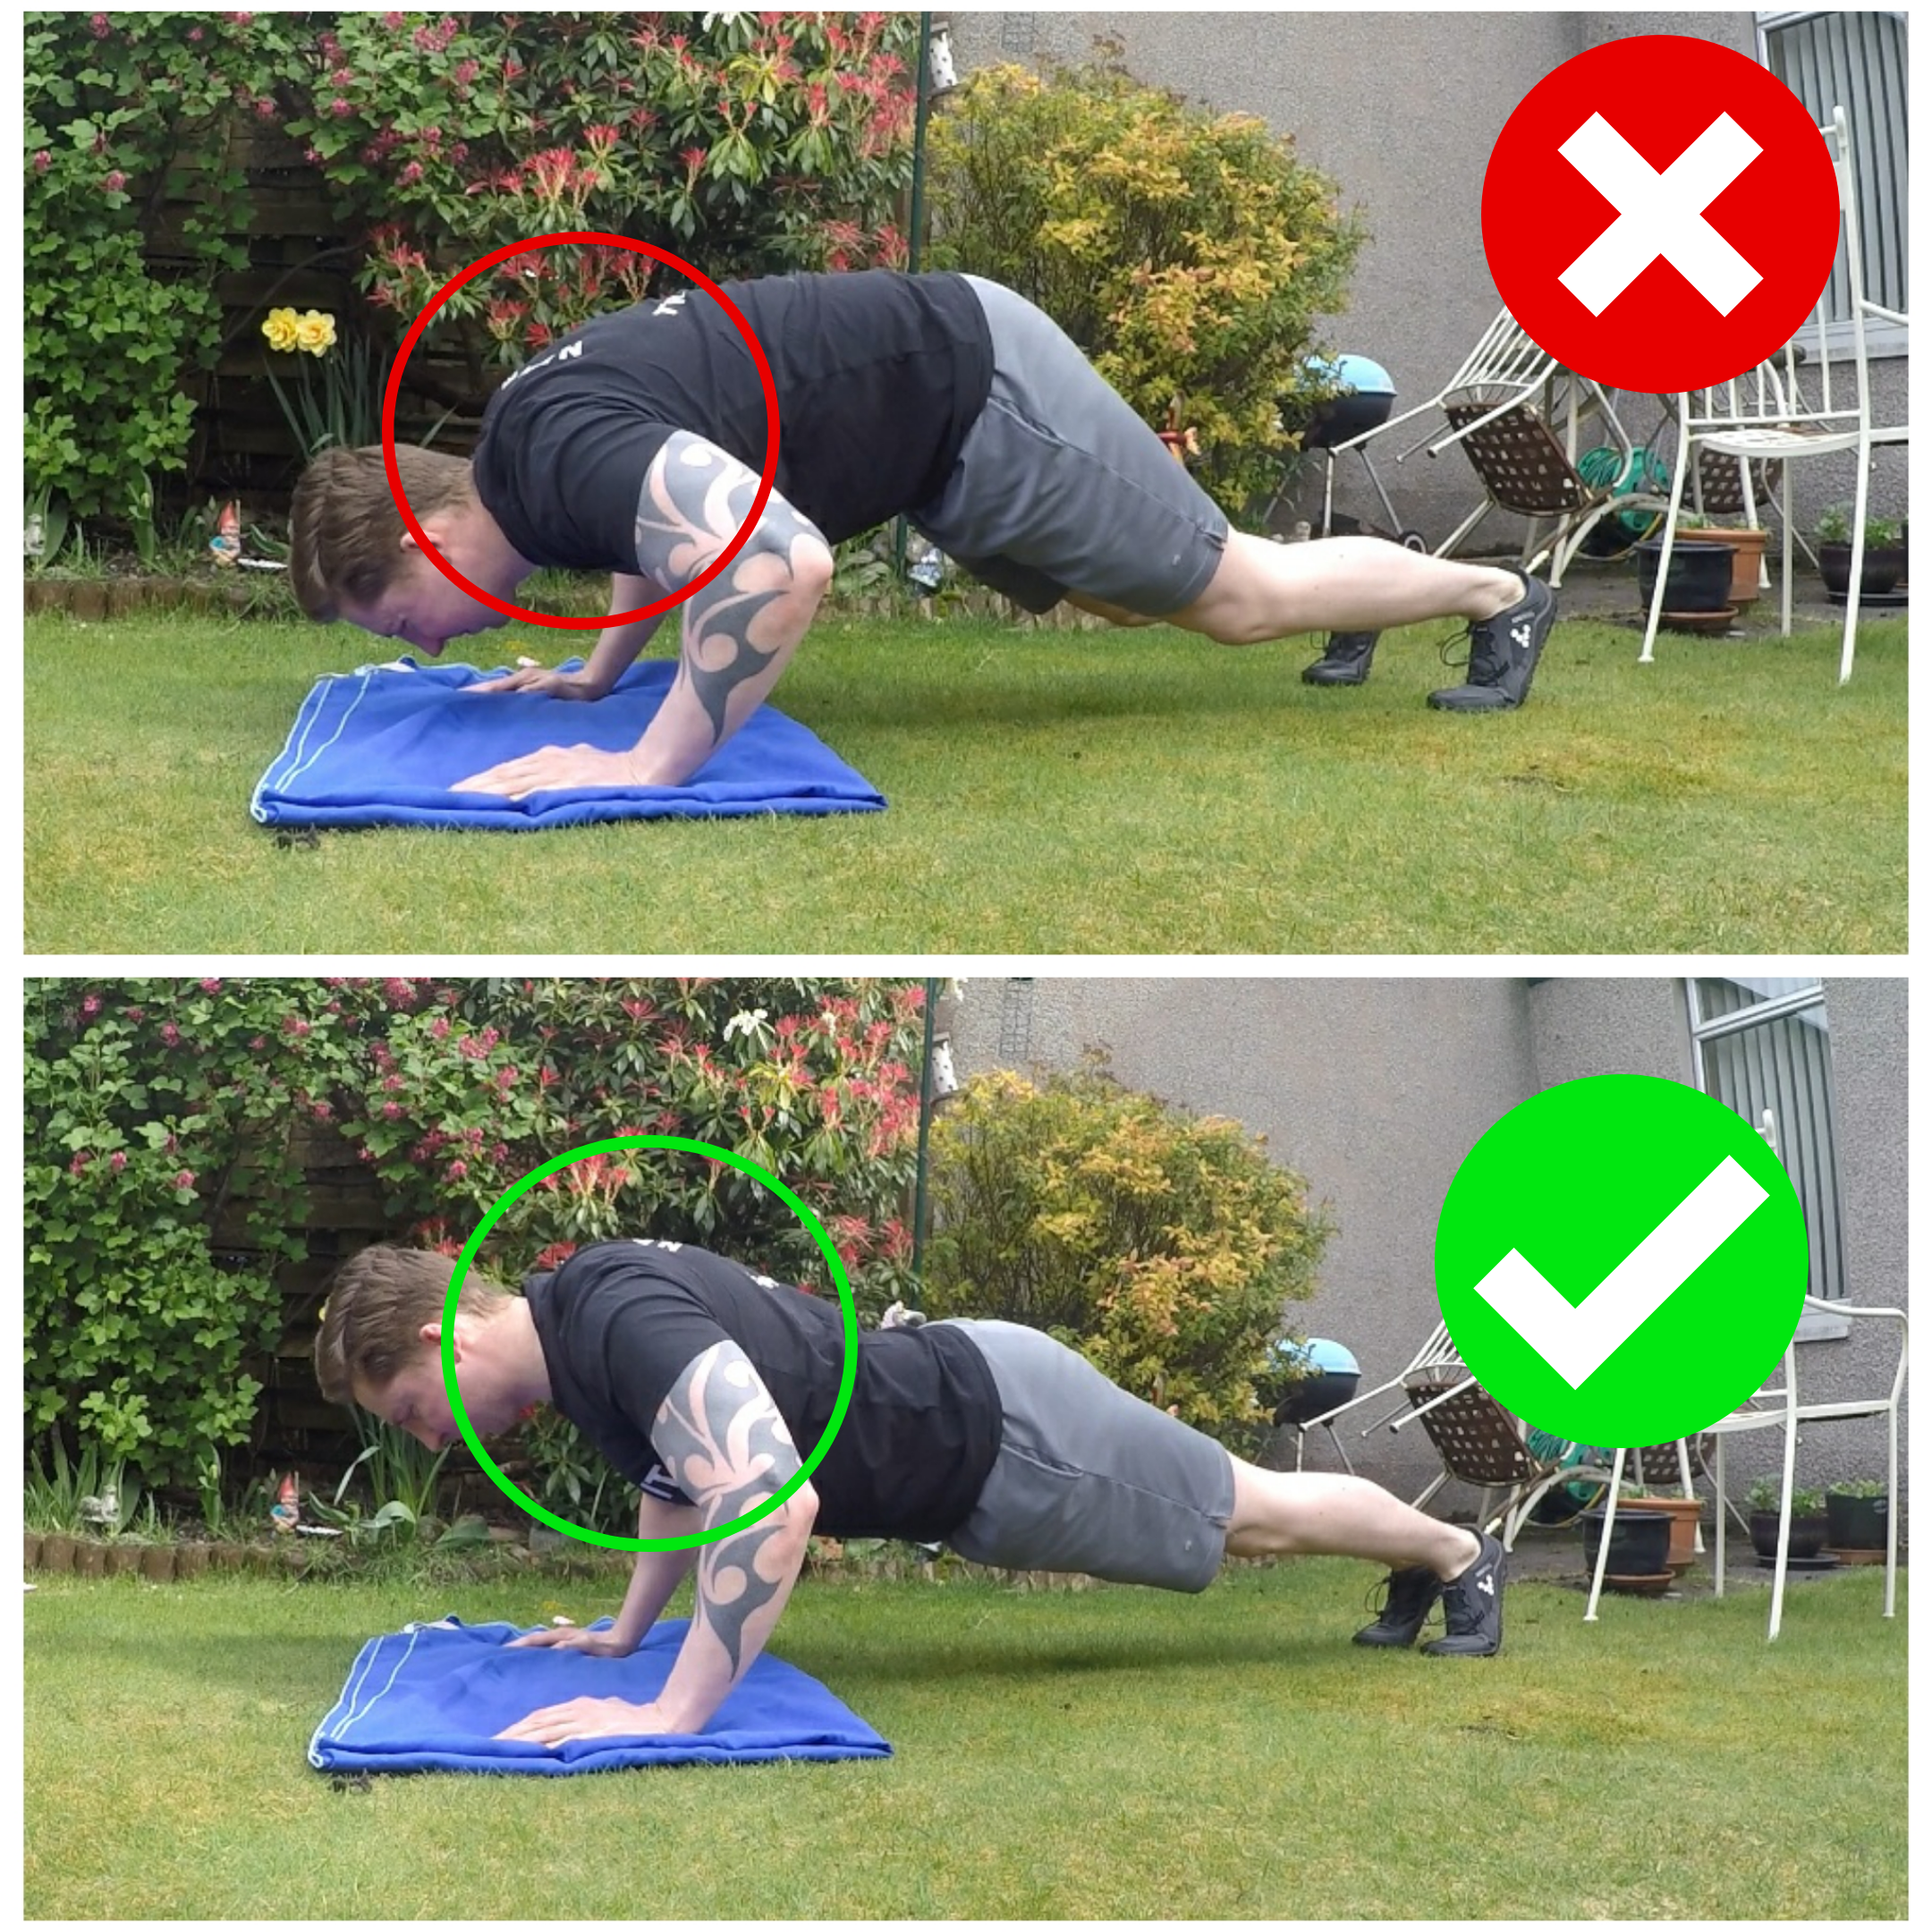
Squeeze the Butt, Engage the Core
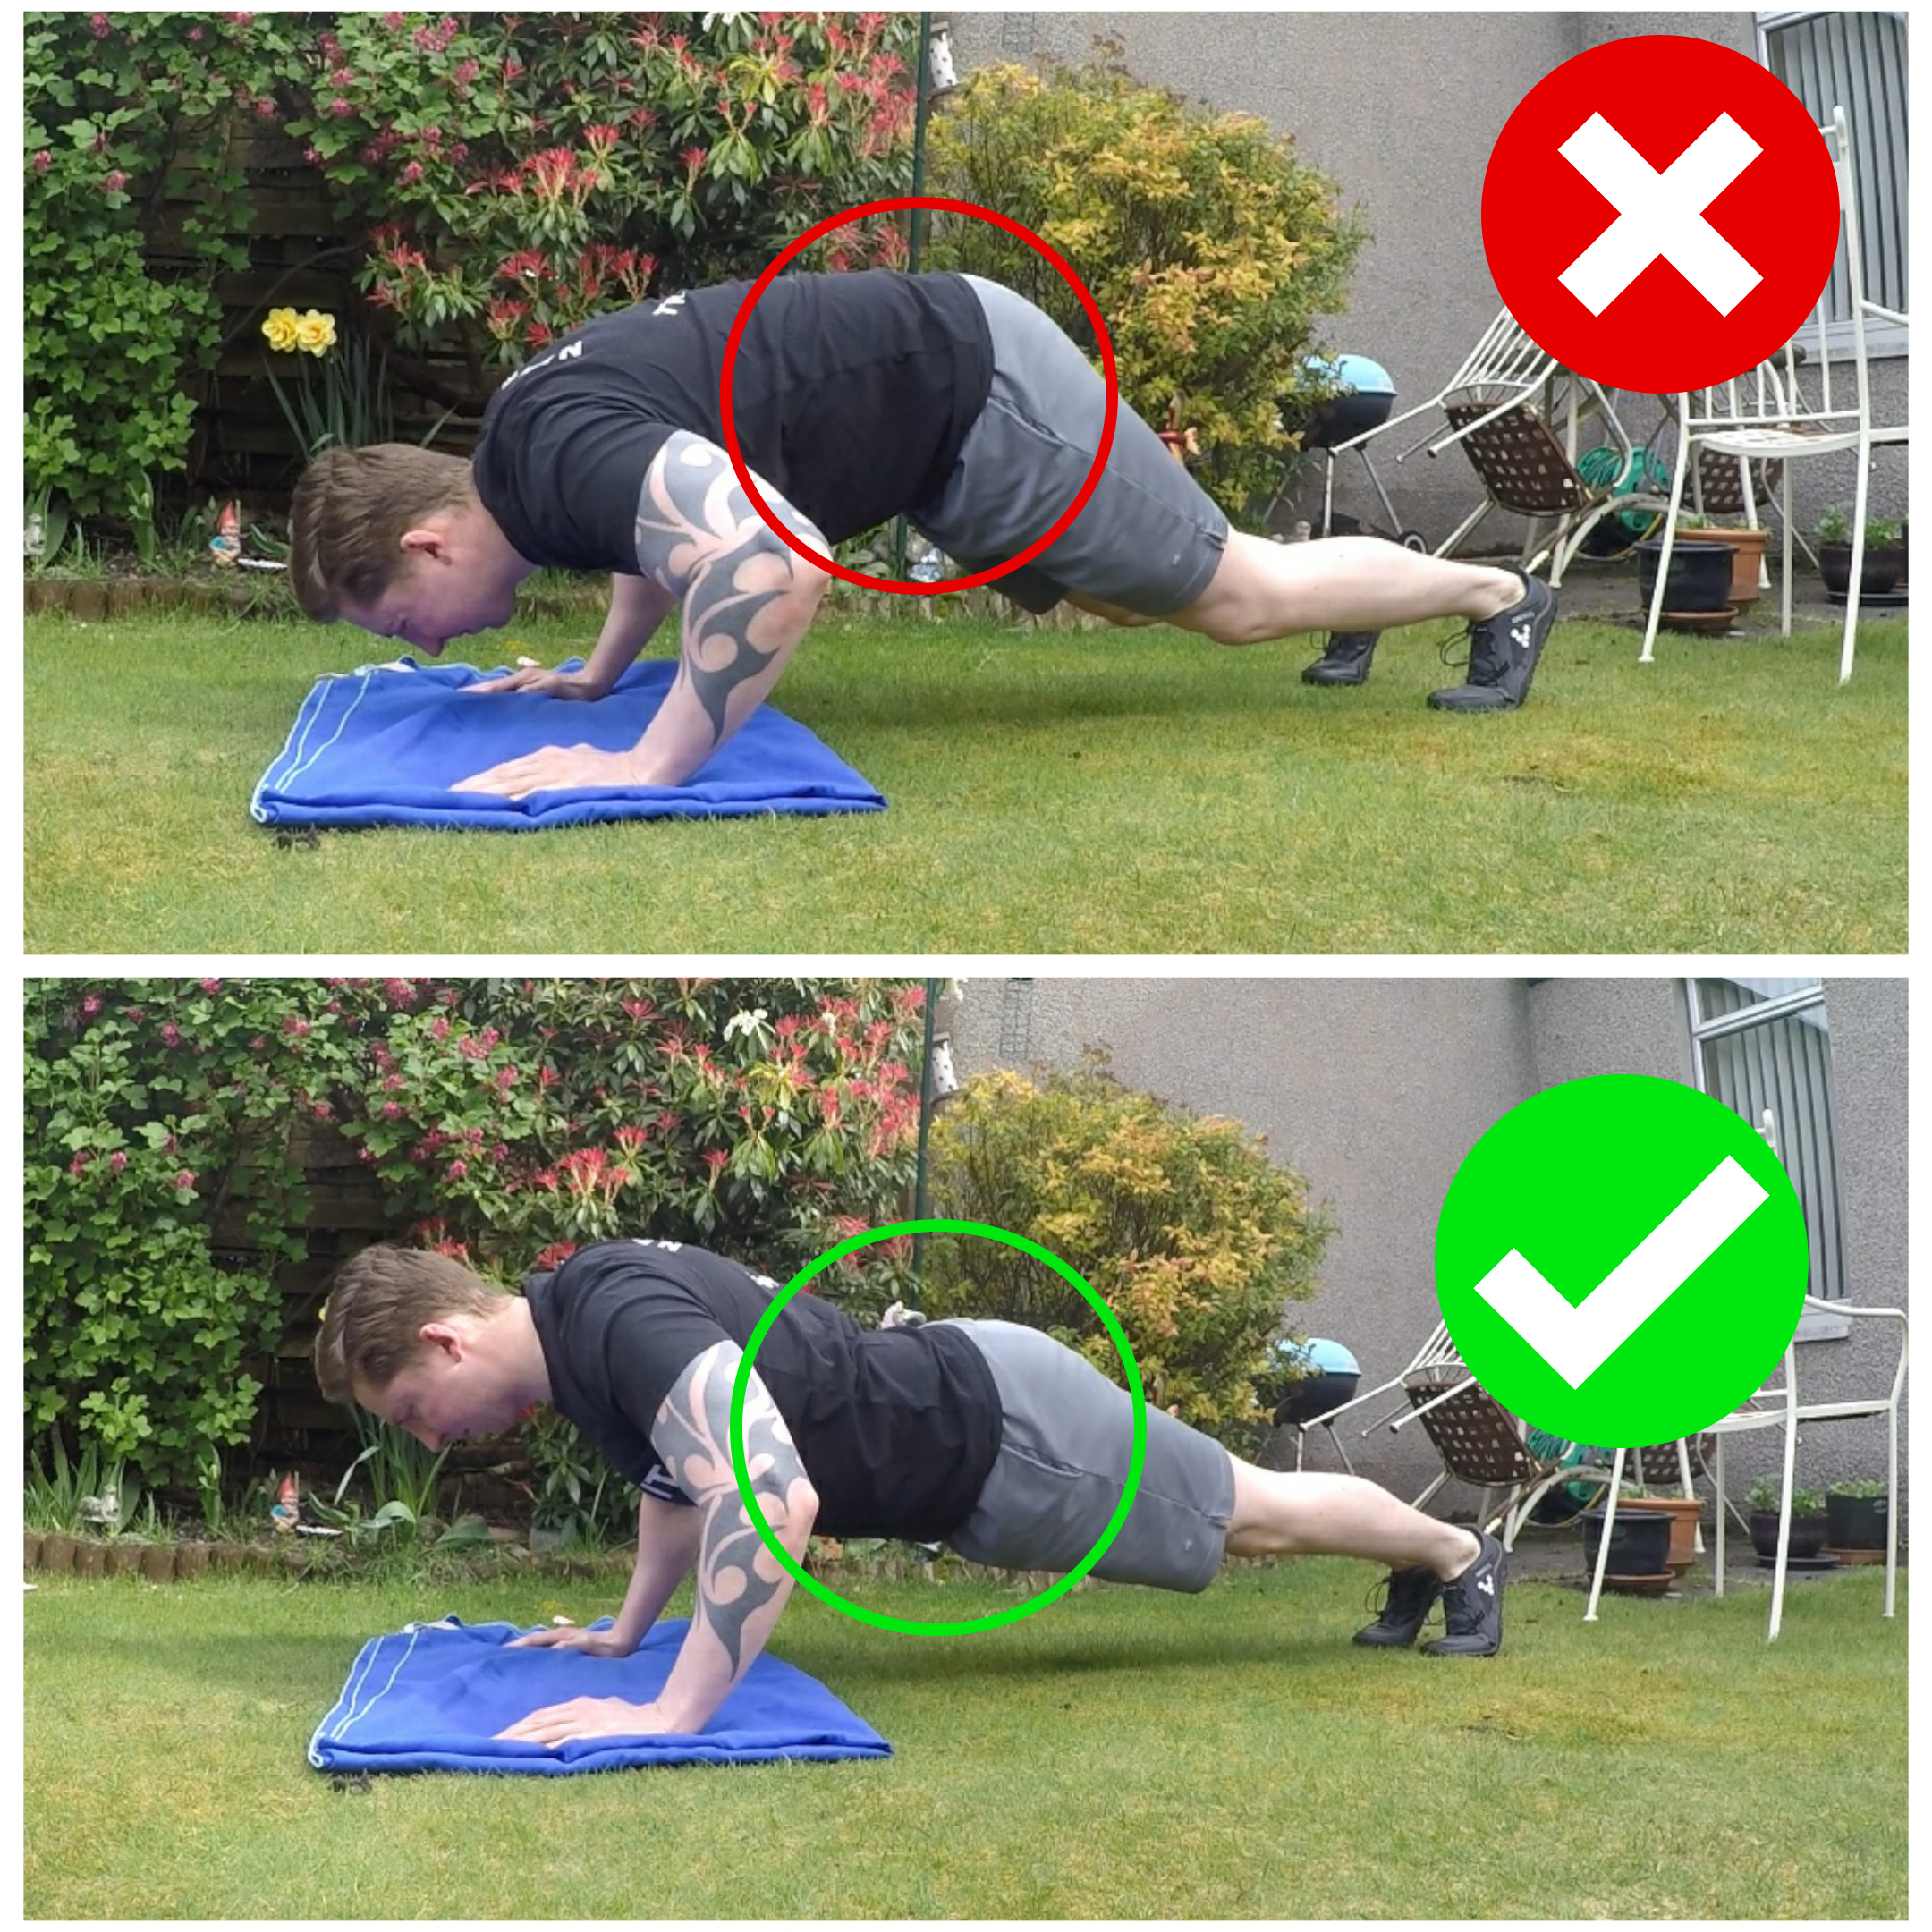
If our butt starts to rise, we’ll change the angle our arms are moving relative to our torso, which will force the shoulders to take on more work and limit our press ups (similar to Less T, More A). By squeezing our butt and core muscles, we can hold a straight body position, giving our upper body muscles the best chance to crank out more press ups.