
Day 1. Clench Everything

How do you instantly increase performance (kg’s and reps) and reduce risk of injury? /clench everything. And I mean EVERYTHING.
Your butt, back, core, hands, teeth (if you have a mouthguard to protect your molars) are pivotal to a stronger movement - something known as Sherrington’s Law of Muscle Irradiation. Also known as “muscle cheering”, this is when one muscle group is working hard (under tension or clenching hard), the muscles nearby also start activating to join in and help out.
Think about dropping a rock in a pond - the rock is the starting tense muscle, and the water rippling out is the “muscle cheering” effect. By clenching EVERYTHING or getting tight at the start of a movement, we increase the number of “rocks” thrown in the pond (tense muscles), maximising the ripples (other muscle fibres) for greater power output. By teaching our muscles to work together like this, we can get more muscle fibres firing - which means more stability, more power and better quality movements.
So next time you get ready for a movement, brace/clench/hold EVERYTHING!
Day 2. Don’t Subtract, Just Add

Healthy eating - instead of eating less, how about eating more?
We’ve all seen the crash diets and “I’m not eating any more unhealthy food” resolutions, and 90% of the time they don’t last long term - because they’re too much of a change and, let’s be honest, “unhealthy” food/drink tastes good. So telling ourselves we can’t have any of something just makes us crave it more.
The problem is that no food is truly “bad” for you, it’s just the quantity or amount of it that we eat can get excessive, meaning there’s no room for more nutrient dense foods (leafy vegetables and other natural whole foods) in our diet. So if you’re wanting to eat more healthy, instead of cutting stuff out - add healthy foods on top of what you normally eat. Maybe some kale with lunch, a chopped bell pepper on the side of dinner, or some grapes along with your breaktime snack.
This way we can get more nutrients in our system, and find nutritious foods we ENJOY eating. The key is to set small achievable goals - you wouldn't go from never having run before to running 100 miles a week, and it’s the same with eating healthily. One step at a time, make a little progress each week - slowly adding in nutritious food, eventually swapping meals for healthy ones you know you enjoy. This way we can still love mealtimes, socialise, and eat food we like while getting healthy.
Day 3. Sneak Bulking

If you’re like me, bulking and keeping weight on is a pain. Eating more is a struggle, so why not just drink in some extra macros?
While protein is important, we can’t put on any mass at all without a surplus of carbs and fats. Eating whole foods should always be your first port of call, but there’s no reason we can’t add a few drinks in give our jaws a break. One of the easiest options is just to grab a pre-made smoothie - not a cheap option, but the extra 50-70g of carbs from a 750ml bottle can be handy in a pinch.
The other option is to grab a blender and make your own! While fruits are the main staple, add in yoghurt, leafy veggies, oats and even spreads like Nutella or peanut butter to add extra nutrients and flavour. This goes for protein shakes too, add in oats, spreads fruits and blend it up to sneak in extra carbs and fats.
I wouldn’t recommend taking in extra fizzy drinks - while they are easy to drink and contain lots of simple carbs (like fruit juices do), they also contain a bunch of extra chemicals like preservatives and colourings which aren’t too good for our bodies in large amounts.
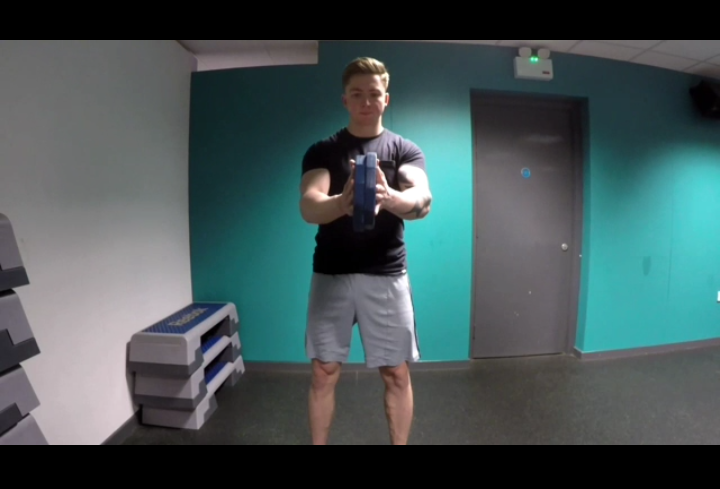
Day 4. Chest Finisher
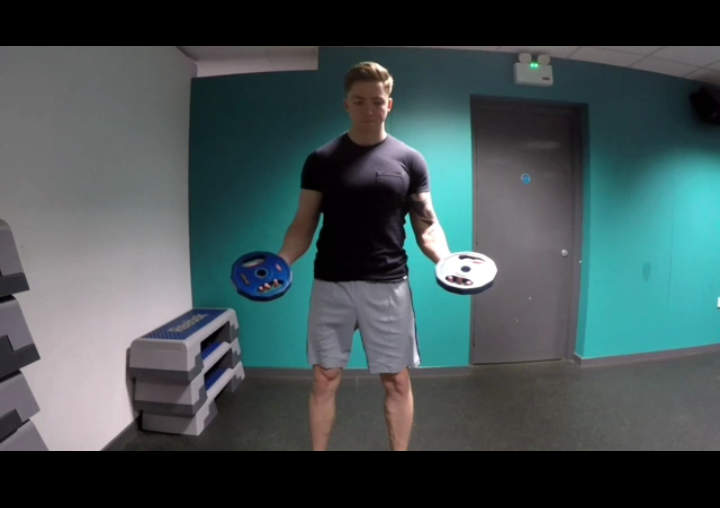
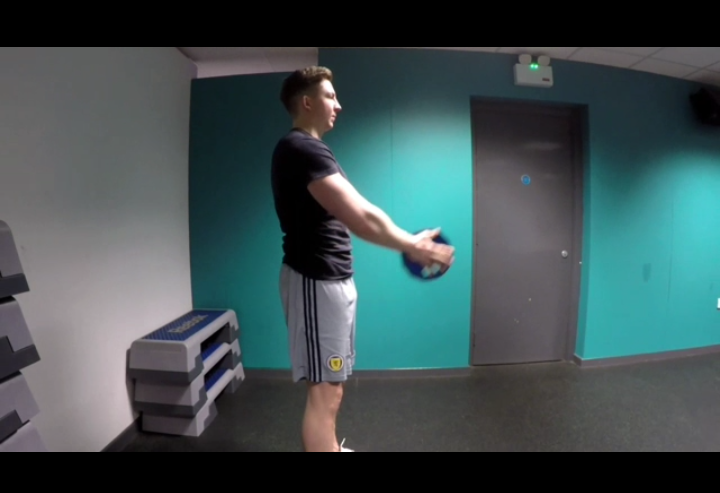
Destroy your chest and craft cleavage with this deceptively hard chest finisher.
All you need are 2 weights plates - start light to get the feel for it - take one in each hand and squeeze them together as hard as you can. Don’t hold them with your fingers, keep them together solely by squashing them between your palms.
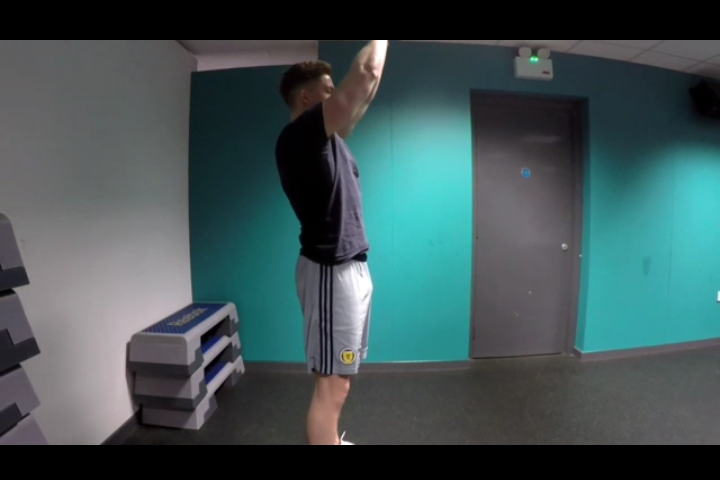
From here, extend your arms straight out in front of you, then bring them back to your chest. Repeat 2-5 times, then keeping your arms straight out start moving the weight up and down in an arc. Repeat this 2-5 times, then go back to performing the first movement. Continue to repeat these 2 movements until your chest bursts into flames, or at least feels like it’s about to.
This exercise works by keeping constant tension on the chest, the tricky part is to keep squeezing the plates as hard as possible and not letting up. Although not a true isometric exercise - for that just squash the plates together, keeping arms still, for as long as possible - it’s close enough that it works the muscles in a different way to regular pressing or fly movements, so is a great way to make sure the muscles get completely worked. As there’s no heavy weight being used, it’s easy to set up and the risk of injury is incredibly low. These work best in circuits/supersets and at the end of a chest or push workout.
Day 5. Power Posing

Performance hack - strike a pose.
More powerful than a caffeine hit, simply believing in yourself can make the difference between hitting a workout/competition/life PB and crumbling. Unfortunately, confidence doesn’t come in a can.
However, we can hack our own body language to get the edge on our self doubt. Simply adopt a “high power” posture (eyes up, chest out, shoulders back, feet planted at least shoulder width apart - think taking up as much space as possible) for 1-2 mins, and your brain will start to release more testosterone and less cortisol.
If you watch certain gym goers or athletes as they get “in the zone”, they’ll start to unconsciously and automatically adopt a more “powerful” posture - while still or walking around like a mountain gorilla. If you’re worried about looking weird, just go somewhere private and get your pose on.
This helps reduce the “I don’t know if I can do this, what if I fail?!” voice in your head, allowing you to focus on what you’re doing and finishing it, instead of panicking and focusing on what can go wrong. As long as you’re following good safety protocols (safety bars present/spotter/know what to do if you get in trouble), there’s no reason not to go out and get after it.
Day 6. Breathing for Abs

Most people half rep their ab exercises without knowing it - this trick will help you get the most out of each movement.
When performing big compound movements we can benefit from bracing or clenching everything - but for ab targeted exercises we can change our approach slightly and get more out of them. By breathing out as we contract our core muscles, we can squeeze them much harder and further than if we have a torso full of air. By working them through a greater range of movement, we can get more out of each rep - increasing the effectiveness and thus increasing gainz.
Movements should be controlled, slowly breathing out as you contract the muscles, and blasting out any remaining air at the end of the exercise with a “shhht” or “ffffft” to get a little extra contraction. Breathe in again as you return to the relaxed starting position of the movement, then repeat.
Being able to contract your abs while breathing out also helps train your deep core muscles (transverse abs), for greater stability and core control. If you want to train these deep muscles more specifically, check out my blog article “Broomsticks: The Only Waist Trainer You’ll Ever Need”. This works for any ab exercise that you have to contract your core to move - for example hanging leg raises, Russian twists or wood choppers (pictured). But for exercises that you have to hold in place - like the plank or the farmer’s walk - this will just weaken your solid stance and defeat the purpose of the exercise (to hold the position), so normal bracing should be used for these exercises instead.
Day 7. Front Squat Like Superman
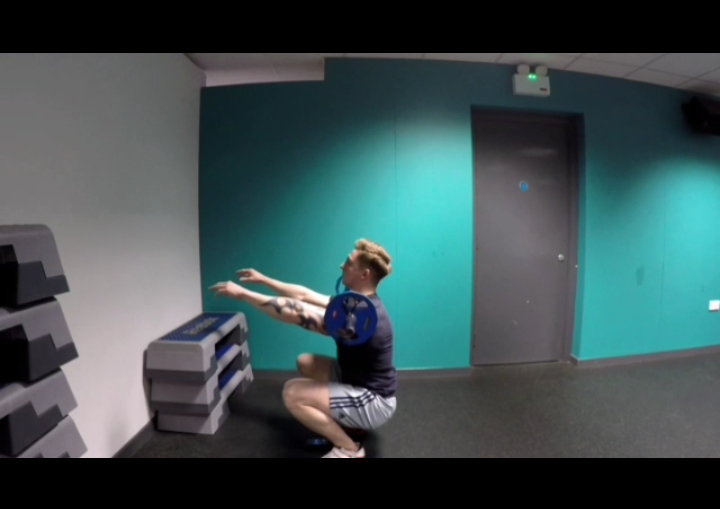
Front squats - if they’re comfortable, you’re probably doing them wrong.
While amazing for developing your quads, glutes and a strong core; many people struggle to perform the exercise without the bar slipping - putting excess stress on the arms to hold it in place, limiting how much weight they use and how many reps they can perform.
The problem here is bar placement.
Instead of having it rest on your upper chest and across where your arms meet your shoulders, the bar should be pressed right back up against your neck, resting more along your collar bones. From there, whether you have your arms crossed or fingers underneath the bar, make sure your elbows are pointing slightly up to keep the bar in place. This helps keep your upper back tight, keeping you from tipping forward and the bar rolling away from your centre of gravity.
In the pics I’m doing a Superman or Zombie front squat to highlight how the angle of your arms keeps the bar in place. With more weight, the forces trying to take you out of balance are increased - so arms may come into play a little at the bottom of the squat, but should not be so much that they’re carrying the weight. Always aim for the bar to be balanced on your body so you don’t need to waste energy wobbling back and forth or bringing it back into alignment.
Day 8. Working Around an Injury

Recovering from an injury - rest isn’t always best.
Despite our best efforts, injuries can still happen - pulls, strains, joint issues, random pains and niggles. Now before you jump in, today’s tip is not to ignore and power through - it’s to listen to your body and find a way to move without making the injury worse.
By moving, we get more fresh blood containing nutrients and healing metabolites into the joints and muscles - helping the healing process get to work, keeping our other joints/muscles healthy and active, and get us back to normal quicker.
The key is to find PAIN FREE movement to get the blood moving.
By finding a movement that doesn’t cause you injury pain - you may still have DOMS or regular muscle soreness - we know we’re not doing any extra damage to the injured area while moving. This doesn’t mean jumping in and maxing out on something new - ease into it. Just moving the nearby joints, even without resistance, is enough to start getting the nutrients moving into the desired area.
The tricky part is finding movements that are pain free. This could mean changing the grip or angles you use (squatting feet close together instead of far apart), swapping free weights for machines or bands - resistance bands are fantastic as they start light and get tougher through the movement, taking the stress off the joints and elongated muscles at the start of the most exercises. When using bands or light weights, the greater range of movement we have the better - but if using a full range causes pain then don’t worry about sticking to a reduced range. The key is always to use a PAIN FREE movement for healing.
Day 9. Stretch Later

Get flexible - but not before training.
Static stretching (holding a position) is useful for getting more flexible - extending our range of movement and making our joints more mobile. However, if you include static stretching in your warmup you could be compromising your performance.
Research has found that using static stretching as part of your warmup can reduce muscle strength by nearly 5.5%, cuts muscle power by 2% and reduces explosive muscular performance by almost 3%.
This is because the static stretching can cause damage and irritation to the muscles, tendons and fascia being stretched, making them more unstable when training immediately afterwards. Instead, what has been found to be effective are dynamic stretches - things like walking lunges, squats, and arm swings. With these, you don’t push through the stretch, you keep the movement dynamic and just extend the range of movement with each rep.
This doesn’t mean you need to ditch the static stretches forever, just save them for after a workout or on rest days.
Day 10. Quick Portion Sizes

Calorie and macro counting are a drag - but we have a tool on hand to make portion sizes easier.
Instead of tracking and calculating everything, we can use the Precision Nutrition method of using our hands to judge portions. This method works best with natural whole foods (not processed or man-made), and is based on the fact your hands are in proportion to the rest of your body.
For maintenance or general healthy eating: males should aim to get 2 portions of each food group per meal, and females should aim to get 1 portion of each food group for a balanced meal. There’s no predetermined “best foods” for each food group - other than the more “whole” or “less processed” the food is the healthier it is - encouraging variety in your diet.
This will make sure you get plenty of micronutrients to keep your cells happy, and allow you to experiment with different flavours and combos. This is a solid starting point to eat more healthily, but the number of portions per meal or per day will be different for each individual based on activity levels, body somatotypes, meals per day, dietary needs/preferences, and any physique goals we’re trying to achieve.
Day 11. Hold Fast

Today’s tip isn’t so sexy, but it will save you some skin.
Running shoes don’t always fit perfectly, taking time to break in and fit to your foot. This can mean they rub against and start to break down the skin at certain contact points of your foot.
In most cases, a plaster will cover the area and let it heal/prevent more damage; but if it’s near the ankle joint, chances are the movement at the joint combined with the movement of the lip of the shoe will have it rubbed off before the first mile is done.
To keep the plaster on, just wear a decent sock. This prevents the lip of the shoe getting under the edges of the plaster, and even if it does start to come loose the sock will hold it in place. Some people will just wrap the joint up in bandages, but this can impair your ankle and the little bones of your foot moving as they’re meant to - weakening your foot in the long run.
Day 12. Elbows… Down?

Like front squats, we want to be aware of where our elbows are pointing - but this time it’s more downward.
If we keep our elbows high up while back squatting (pics on left), the bar might feel a little more secure - especially if you squat low bar - but it puts our shoulders in a pretty bad position. Combined with the extra pressure of squeezing the bar, and things will start to get squashed.
Hold them up for several sets and workouts, and your arms might start to feel funny - numbing and pain. This is from the bad shoulder position impinging the underlying nerves running through the shoulder and down your arm. Keep this going long term and you could do some damage to your nerves.
So to keep them healthy, keep the elbows angled more downward (pics on right). With our elbows at a more downward angle, we can squeeze all our back muscles to keep the bar in place and brace properly, without crushing and impinging the nerves.