There are millions of workouts, gym programs and weird exercises that can “get you results”, but what if these results take us further from our goal? Wasting our time and energy with a result we don’t need?
A giant power belly will help us stay stable in the squat to move some heavy ass weights, but it won’t help our tucked aerodynamic position on the bike.
What we need is a plan to make sure we’re going in the right direction, and when it comes to physical performance (strengthening and conditioning the appropriate muscles for a certain movement/effort), we need a Strength and Conditioning plan (ta-daa). While it might not directly affect our skill level in the desired sport, it will help us make our muscles more powerful, more explosive and last longer before fatiguing, and help to reduce our risk of injury.
Sounds great, but surely most programs can do that?
Kinda. Consider that every sport has slightly different demands, and every athlete within that sport is different (player position, weak/strong areas, previous injuries, experience level, goals/aspirations), and we can see that not all programs are created equal. One might work wonders for one athlete or sport, but be useless for another - picking one at random will be a total crap shoot.
That’s where I come in.
I work with athletes and clients to create and nail down a program that’s going to help get them where they want to be, in a way that suits them and their current circumstances.
But what does that look like? In this first part of this two part article, I’ll share an example Strength and Conditioning block of training that you can use to improve your football performance (soccer for the Yanks), and in the second part I’ll show you the thinking behind some of the decisions made, without plunging too deep into the analysis pool, so you can see why some exercises have been included/excluded, and how it all fits together (click here to peek behind the curtain).
It’s not necessary to read both, feel free to just jot down and implement the program, and go lay waste to the pitch.
This first article contains suggested Pre/Post Training Tests (though these are optional), strength workouts, how to progress week to week, conditioning workouts (running in this case, including weekly progressions), and an exercises bank that has a quick description and pics of each exercise. This block is designed to run for a up to 5 weeks - due to individual differences the progressions will be more or less sustainable for different people, so I’ve designed the block so that you have some autonomy in how you follow the program. This means one person may blast all 7 strength and conditioning workouts each week for 5 weeks, and another crushes 3 selected workouts per week for a month, but both will be able to make progress with a program that fits in their life.

Without much further ado, it’s time to dominate the field.
SAMPLE FOOTBALL TRAINING BLOCK
Pre/Post Block Tests (optional)
These are merely a suggestion, allowing you to see your current stats and see how you have progressed by the end of the program. If you do decide to do them, don’t feel you need to do every single one before you begin if it’s going to majorly delay you starting - not knowing your current estimated VO2 max won’t stop you from being able to improve it, we just won’t know how much it’s improved by. The max tests can help you to find appropriate loads for the resistance exercises, but you can also crack on just fine by working up to a weight that feels appropriate on the day.
This isn’t an exhaustive list, just a few that are quick to set up and implement to get us started.
VO2 Max:
in lieu of a sports lab, we can use equations to get a rough estimate. Two of the more popular methods are:
Cooper test - run for 12 mins, aiming to run as far as you can, then plug the distance (in metres) into this equation :
(Distance - 504.9) / 44.73
or
Brigham Young University Test - find your bodyweight (in kg), then jog 1 mile (1609m) - no sprinting, must take at least 8 mins. Immediately after, note down heart rate (beats per minute) and time it took to run as a decimal figure (eg 8 mins 30 secs would be 8.5, 9mins 15 seconds would be 9.25). Take the data and plug it into the corresponding equation
Male Athletes = 108.844 - (0.1636 x bodyweight) - (1.438 x time) - (0.1928 x heart rate)
Female Athletes = 100.5 - (0.1636 x bodyweight) - (1.438 x time) - (0.1928 x heart rate)
Aerobic capacity:
1.5mile (2.4km) run - the time it takes to run 1.5miles (2.4km) as fast as you can.
12 minute run - how far can you run in 12 minutes? Ideally use a track or relatively flat ground for the best results. The distance can also be used in the Cooper test above to estimate your VO2 max, but the distance alone is a decent test if you’re not in the mood for maths.
Sprinting:
40m sprint time - Here we need a track or some markings 40m apart, and we’re timing how long it takes the athlete to sprint 40m.
Sprint fatigue tests - this is the dreaded bleep (or beep) test, whereby an athlete must sprint between two points before the next bleep (or beep) noise. There are different protocols for different beep tests (ie distance you need to sprint, normally 20m but this isn’t universal), but these will be included in the same source as you obtain the bleep track from (there are a few videos on YouTube that have the full range of bleep timings).
Maximal power/strength tests:
Vertical Jump - here you’ll need a measuring tool (measuring tape or stick), and stickers or another kind of removable marker (pop some chalk on your hands is a popular option if there are dark walls). Standing side on to a wall with marker/chalk on hand, reach up as high as you can and place marker/chalk the wall. Then, get into an athletic position and jump as high as you can, putting your sticker on or touching the wall at the highest point and land gracefully. Measure the distance between the two markers to find your vertical jump height. The box jump is another popular vertical jump test, but much of this comes down to how mobile our hips are (bringing feet up to box instead of getting true jump height), so is not a good/true representation of vertical jump power.
Rep Maxes - here we find the maximum amount of weight we can move for 1 rep or multiple reps (eg a 5 Rep Max). This is typically for big compound exercises, such as the back squat, deadlift, hang clean, etc. The key here is safety, so set up any of the necessary safety pins or ask someone to spot you, while prioritising good technique over getting an extra few kilos on the bar. If you’re less experienced with an exercise, it is better to perform a multiple rep max (eg a 5RM or 8RM) until you are more comfortable with the exercise - adding a tonne of weight to something unfamiliar is asking for trouble.
Agility:
505 agility - For this we’ll need a few cones or floor markers and a timer. Place 3 cones or markers along a straight line, the first two 10m apart (cones A and B), and the final cone (cone C) 5m onwards from cone B (so 15m away from cone A). The athlete sprints from cone A to cone C, turns around and sprints to cone B, where the timer is stopped.
T-test - For this we’ll also need cones/floor markers and a timer. Pick out 4 cones/markers, and place them in a T shape, with the middle line (cones A to B) 10m long, the left line 5m long (cones B to C) and the right line 5m long (cones B to D). The athlete starts at cone A, with the timer and athlete ready to begin at the start signal. The athlete sprints from A to B, touching B with their hand, then shuffles left (from B to C) to touch cone C, then shuffles right (from C to D) to touch cone D, then back to cone B and back pedals to cone A (where the timer is stopped).
Strength
The load recommendations are just that: recommendations. If you don’t know your 1 rep maxes or aren’t feeling great on the day, it’s better to work up to a weight that feels appropriate (at the end of the set you still have enough energy for 1 or 2 more reps) instead of trying to grind out a weight that just isn’t moving.
If you know your 5 rep max, this will be roughly 87% of your 1RM (8 rep max is about 80% and 4 rep max is about 90%), but this is an estimation so be prepared for some trial and error. For more rep/max estimations check out the table in the Training Load and Repetitions section in Part Two (click here).
Finally, AMRAP means As Many Reps As Possible - this is only featured in the core exercises as everyone will be at different levels and it’s safer to go all out with these as there’s no weight that can slip and squash us.


*For these injury prevention exercises there is no recommended load, instead be conservative and build up to an appropriate weight on the day (no 1RM’s here)
PROGRESSION
Each week aim to do a little more than the previous week - either by adding a little weight (1-4kg for upper body exercises, 2-7kg for lower body exercises), an extra rep (to one set, or multiple sets) or an extra set (same number of reps as used that session). This block should start out moderately (can confidently add more weight to the bar next week), but be conservative in adding weight as the intensity will quickly rise as the weeks go by (even adding two small 1.25kg plates to the bar each week will be a total increase of 10kg over 4 weeks, 12.5kg if you go for 5).
With progressions like this, I would recommend running this Strength block for 4-5 weeks before taking a deload week (a week off training, or just doing light movements for recovery) to recover for re-testing or starting the next block of training. I don’t want you continuing on indefinitely and risking an injury from fatigue, so be smart about when to finish this block of training - commit to either 4 or 5 weeks of training, but if the weights just aren’t moving or your body is feeling like trash, take some time off to recover and come back refreshed and ready for the next assault.
If you’re re-testing at the end of the program (rep maxes, aerobic capacity, sprints etc), take a 3-7 day rest period before re-testing, eating lots the day before the test - this will allow your body to be fully recovered and in the best condition to smash PB’s. The optimal number of rest (or deload) days will depend on the individual and on what your testing - for more intense tests (eg 1RM testing), take a bit longer (5-7 days), and for less intense tests (eg 12 minute run) we generally don’t need as much recovery time, so these can be done a bit sooner if preferred (3-6 days rest).
CONDITIONING
For cardio, be sure to warm up for 5-10 mins before diving into main work. This includes mobility/stretching, and light exercises to get the blood moving and body warmed up.
I’ve included 3 suggested running workouts for each week, how many you do will depend on your schedule/other training, so don’t feel too bad if you can’t do all of them each week. If there is no hill nearby for hill sprints, these can be swapped for regular sprints - just use the same amount of time sprinting as a recovery period (like the other sprint days).
If you perform them on the same day as a gym workout, I’d recommend doing the cardio afterwards - this means the bulk of your focus/energy can be used on the more complex and demanding strength exercises, instead of hitting them already fatigued from running.

EXERCISE BANK
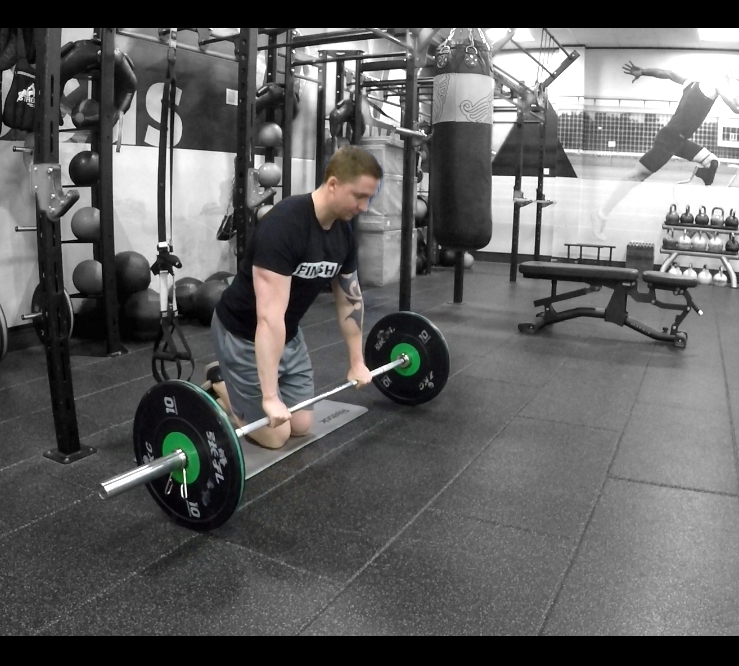
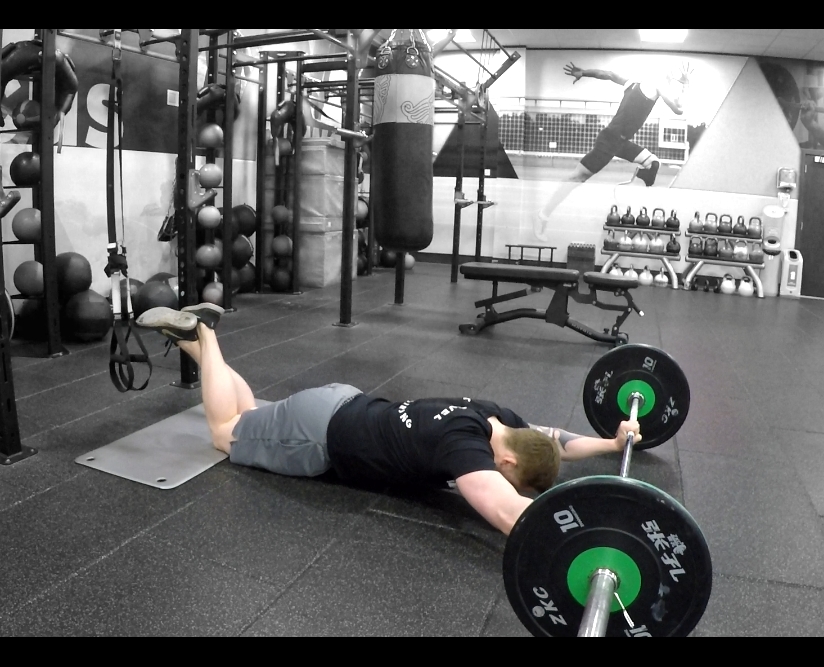
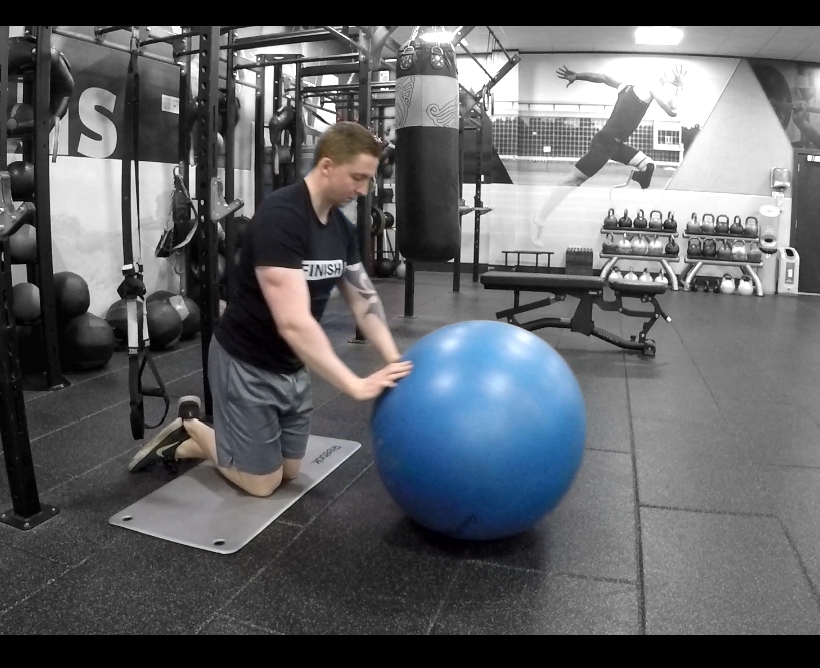
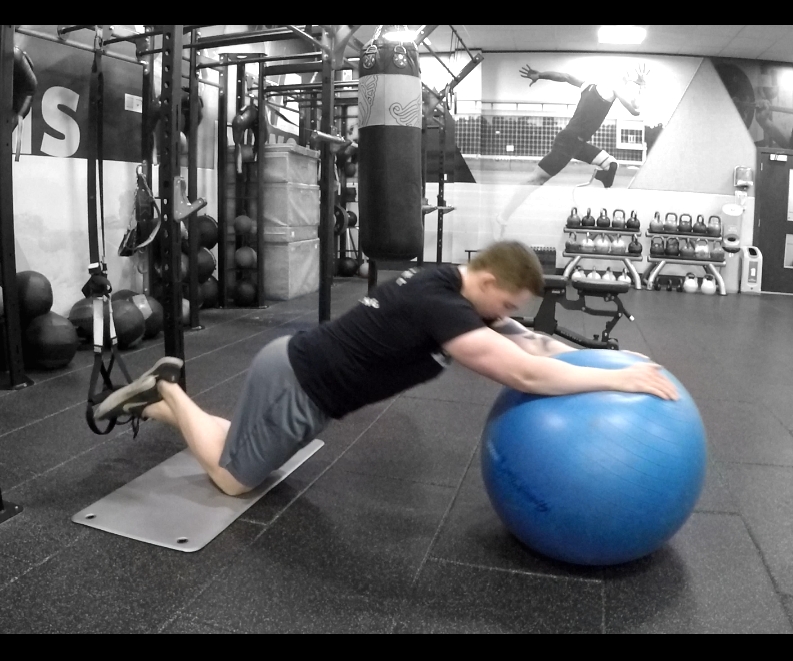
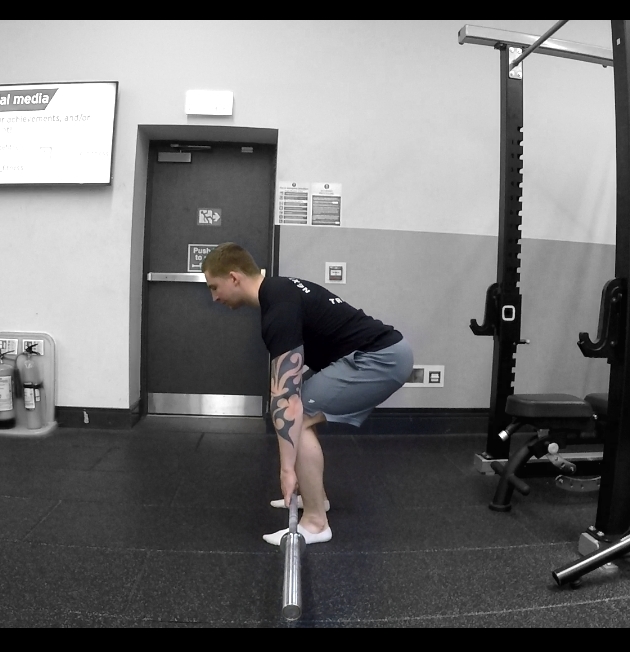
Ab Rollouts
Pop some weights onto a barbell, kneel on the floor and hold onto it with a slightly narrower than shoulder width overhand grip. Roll the barbell forward, keeping a slight bend in the elbows and keeping the core as rigid as possible. Squeeze the abs and pull the barbell in to return to an upright position. This can also be performed with a Bosu ball if the barbell is a bit much. If you can do the standing version, absolutely do it.
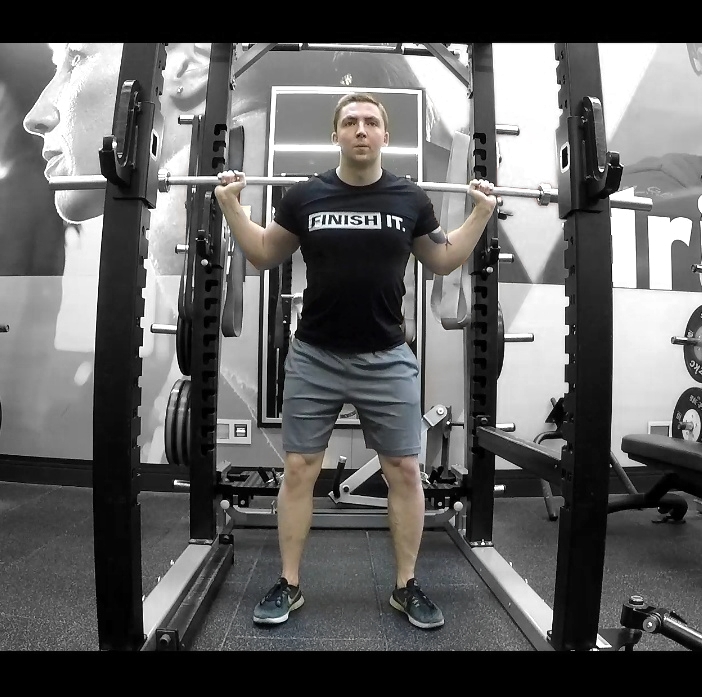
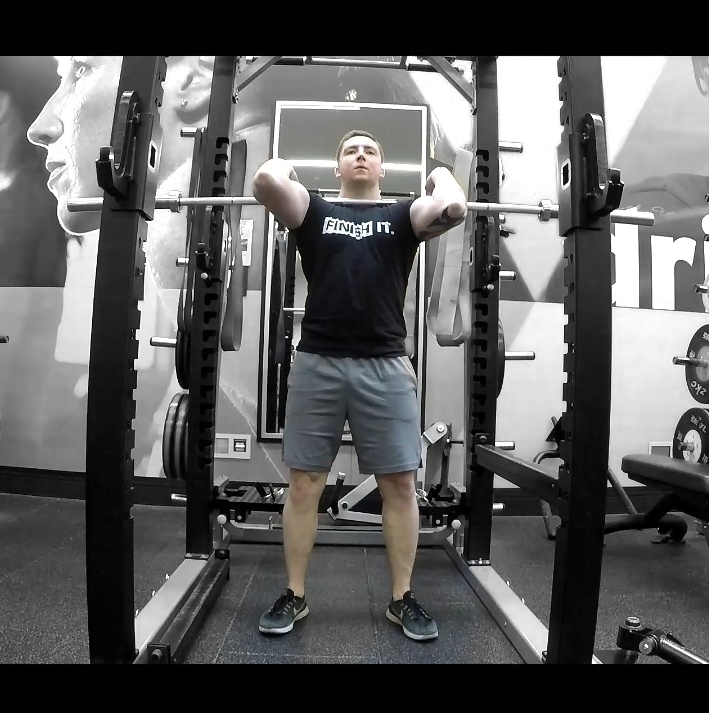
Back Squats
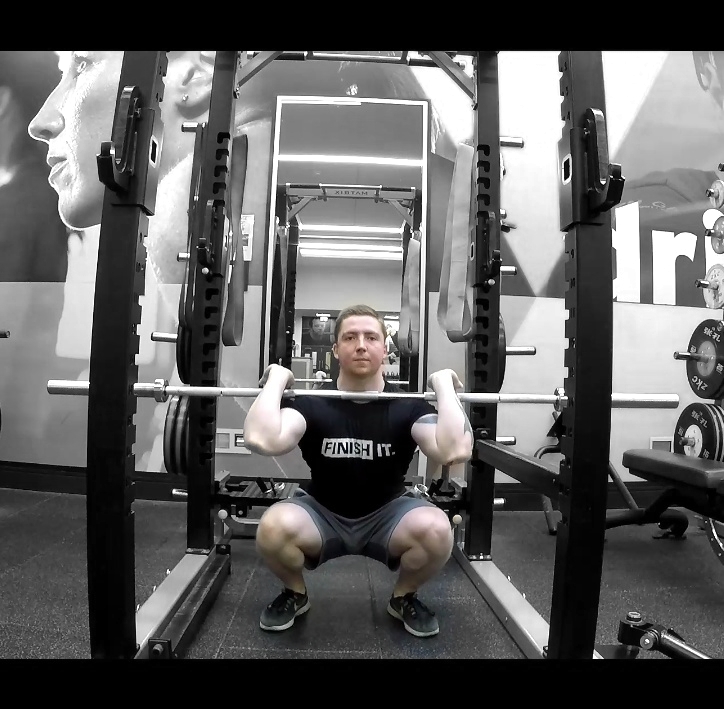
Set the rack up so the bar sits just below shoulder height, holding on with hands wider than shoulder width apart (the wider they are apart will take more strain off the elbows, but we lose some stability - may take some trial and error to find optimal hand placement for your biomechanics). Get under the bar, letting it sit across the top of your traps/shoulders, take a deep breath, brace everything, stand and step back so your feet are about shoulder width apart. Let the weight settle, take in another deep breath, squeezing everything, and start to descend - bending knees and hips at same time, keeping torso upright (a little forward lean is ok). Drop down until thighs are about parallel with floor (hip and knee joint at same height), then extend the hip/knees and bring the chest up to standing position.
Going to parallel is the official squat height, but there’s nothing to stop you going ass to grass if you have the mobility for it and it is pain free (the extra range of motion will translate to greater muscle growth), or stopping short if parallel and beyond gives you pain (that’s more than just muscles getting tired). Unless you’re planning to compete in powerlifting (squats are judged on depth), don’t stress too much on the exact parallel position - people get very nitpicky on the internet, but at the end of the day it’s not worth the hassle of pinpointing the exact millimeter perfect height; just get in, squat hard and aim to stay consistent with the height you squat to. The above description is for high bar squatting, many people prefer low bar (bar sitting a bit lower on upper back), but if you’re new to the squat don’t worry about it - just master the foundation movement pattern first before trying to complicate it. This exercise can also be performed with dumbbells, just hold them at your sides.


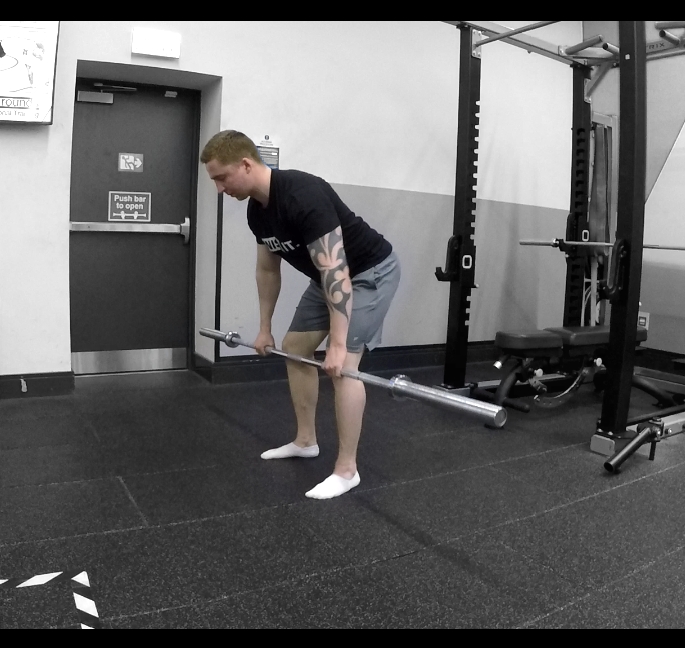
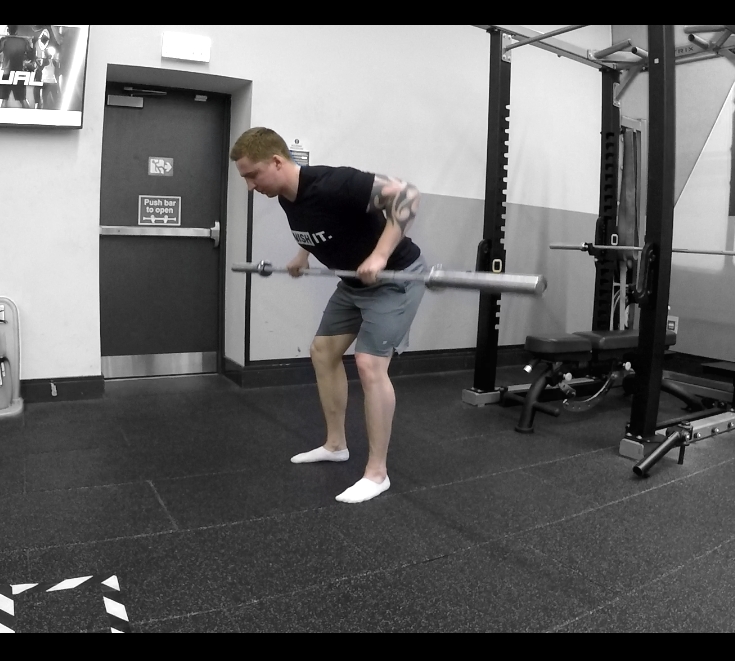
Barbell Rows
Start with feet just wider than shoulder width apart, deadlifting the bar up into a standing position. From here, take a deep breath, brace the core and bend your knees and hips, so that you’re in an athletic stance with your torso angled to about 45 degrees forward, letting your arms/the weight hang straight down. Keeping your back neutral and secure, pull your elbows back to bring the bar up to your torso (aiming for the area between your bellybutton and bottom of your ribcage - finding a spot that is most comfortable to row to), then control the weight back down. Try to move the bar using just the muscles of your back/arms, keeping the rest of your body rigid. We can move more weight if we get some momentum going using our legs to squat/jump the bar up, but as the purpose of the barbell rows in this program is muscle balance, we want the back/arms to be doing the majority of the work (if the purpose was strength/power we’d maybe use some leg drive to expose the body to heavier weight).
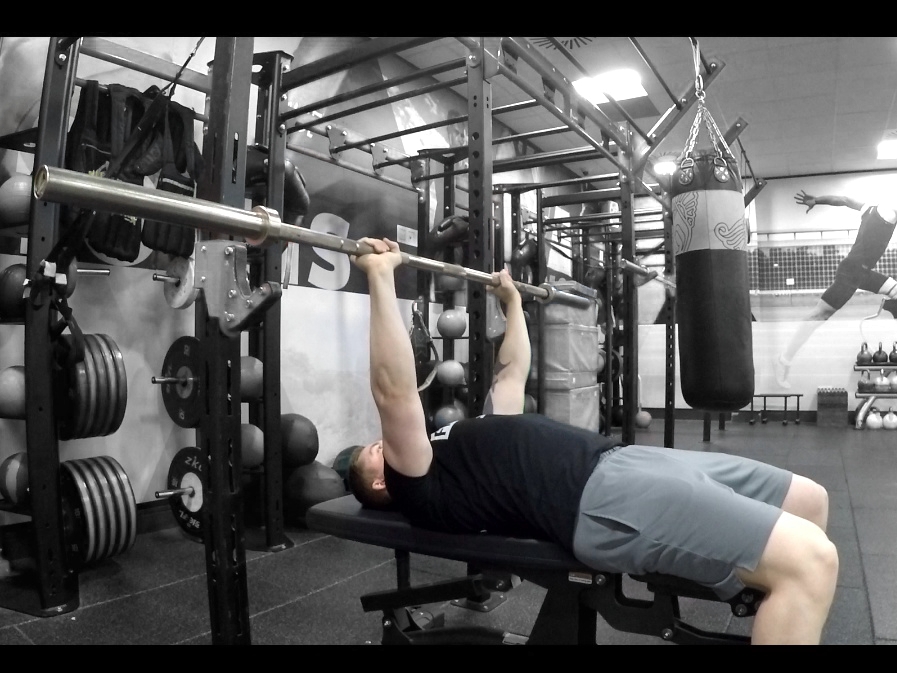
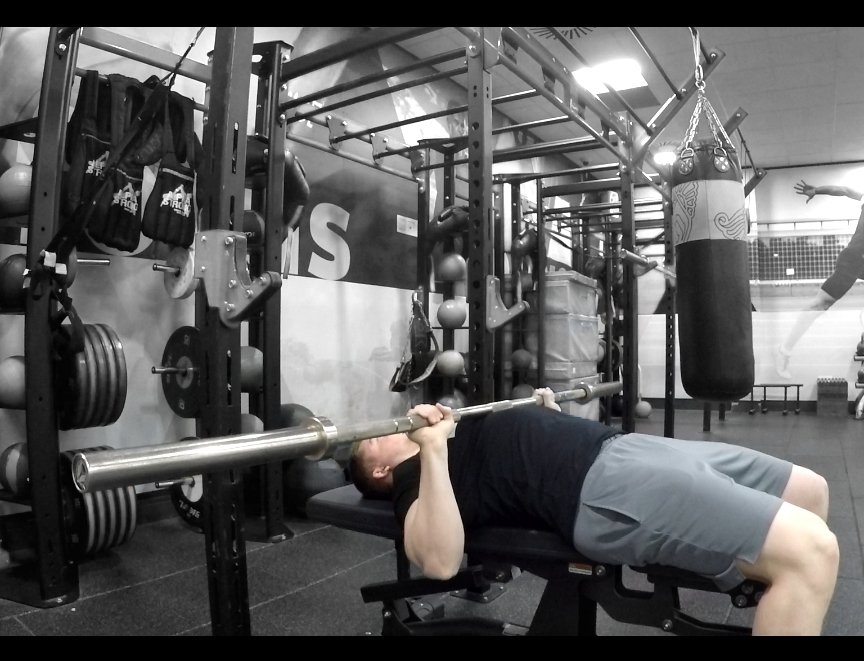
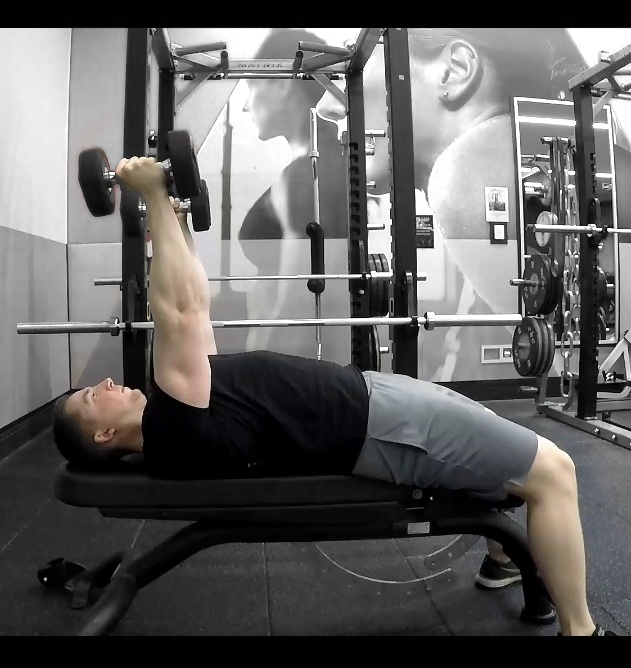
Bench Press
Lying down on bench, have bar directly above eyes, feet planted securely on the floor and shoulder blades pulled back/down to create secure platform. Grab bar about shoulder width apart, take deep breath (brace everything) and lift bar out of rack. Let the weight settle, then lower bar to chest (about nipple level), then press back up (in slight curve back to have arms extended perpendicular to floor. Hand placement will vary depending on what is most comfortable. Don’t worry too much about a big pause at the bottom - just keep the movement controlled and not bouncing wildly. Before setting off on heavy sets, get either a spotter or set the safety pins to an appropriate height, so that if you get into trouble you have someone to help get the bar up off you or you can drop the bar onto the pins and wriggle free without getting squashed.
This exercise can also be performed with dumbbells, you’ll need to kick up/curl the weight to get into the start position, but the movement path is the same once you’re ready to go.
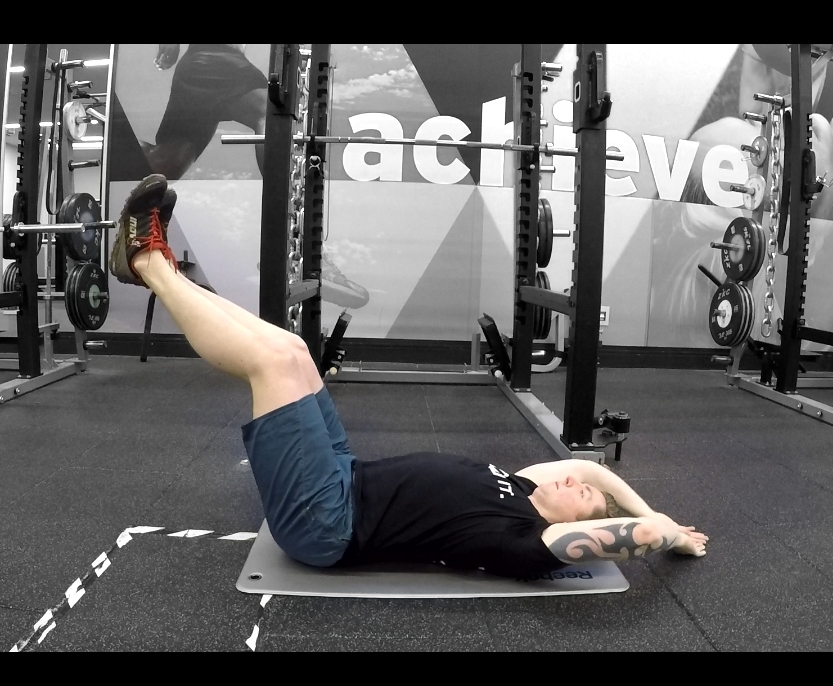
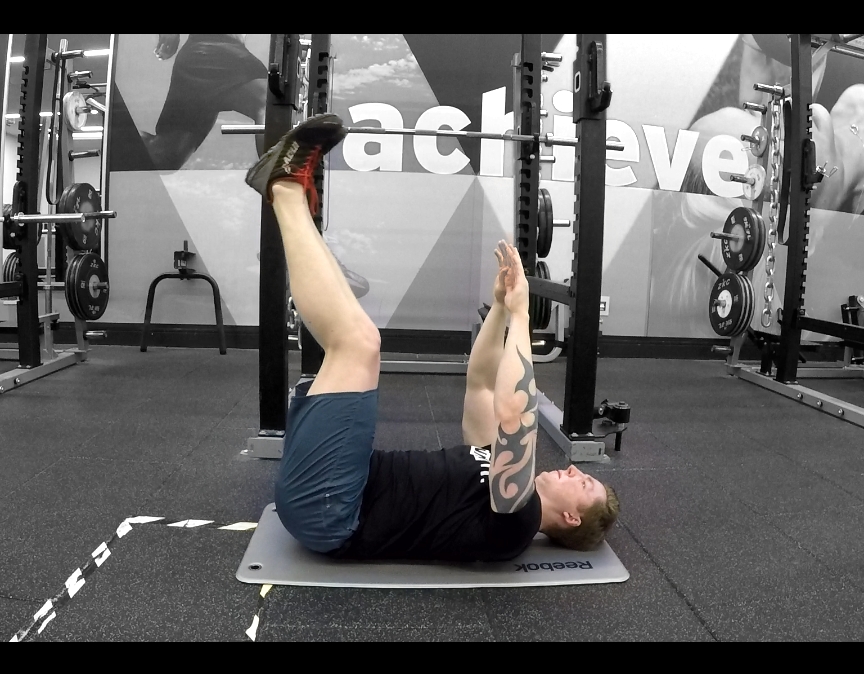
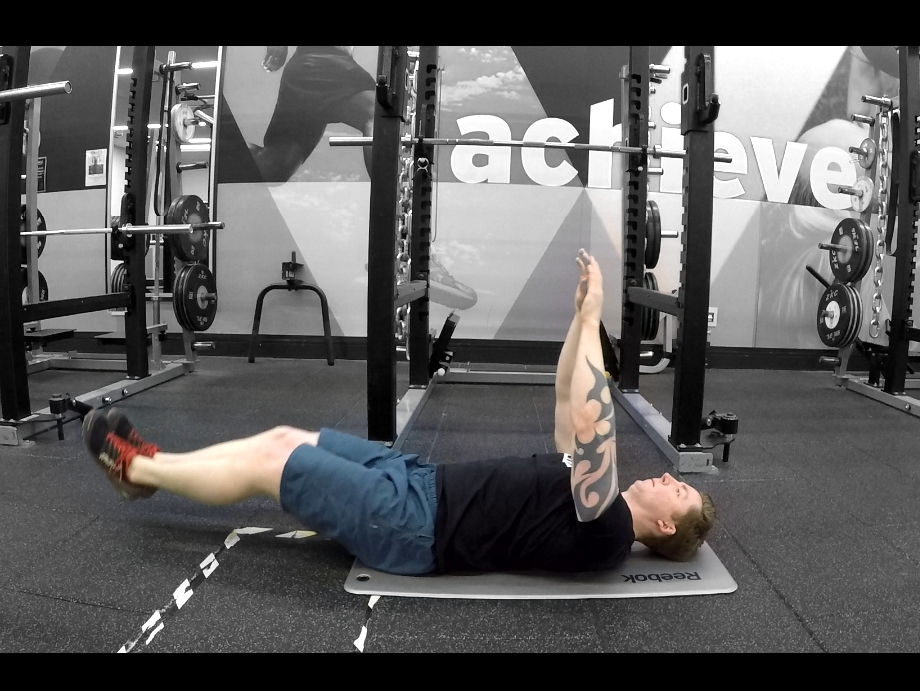
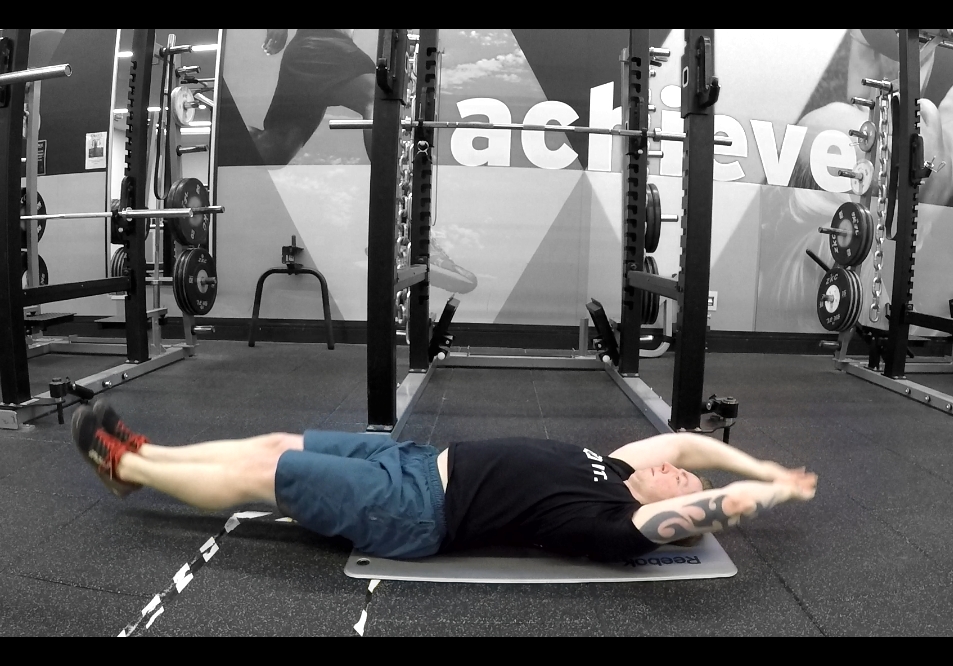
Deadbugs
Lying on back, bring arms and legs straight up perpendicular to floor (or as close as you can, I’m not too flexible). Keeping legs in the air, bring arms up and back parallel to floor, then back up to perpendicular. Then, keeping the arms in the air, bring the legs down to hover an inch or two above the floor, then back up to the start position. Then, bring both arms and legs down at the same time (not touching floor), then back to the start position. That’s one rep. To make this harder we can hold onto a weight with our arms.
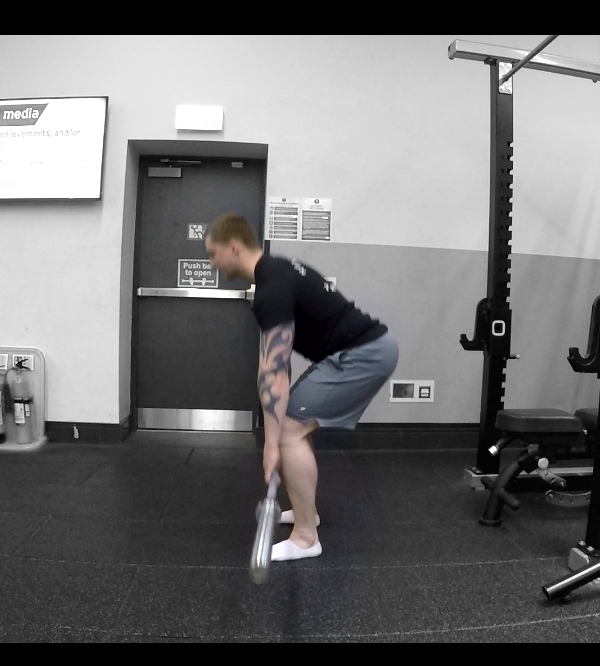
Deadlifts
The king of the lifts. Squat down and grip the bar about shoulder width apart (alternate, hook or overhand grip), with bar sitting over your shoelaces. Take a deep breath in, brace your core and squeeze all your muscles to take the tension of the bar, then power the weight up off the floor - bringing your chest up, keeping your back neutral (no excess forward or back lean/rounding), hips and shoulders rising at the same rate. Arms should be kept locked out (don’t try to bicep curl the bar), and the bar moving in a straight line. Stand tall, then control the bar back to the floor to start the next rep. This can also be performed with dumbbells, just hold the weight at your sides and start with the dumbbells from the floor each rep.
If you’re new to deadlifting, don’t worry about the Sumo stance (feet wide apart) yet - master the core movement to build strength and proficiency before trying to jazz it up.


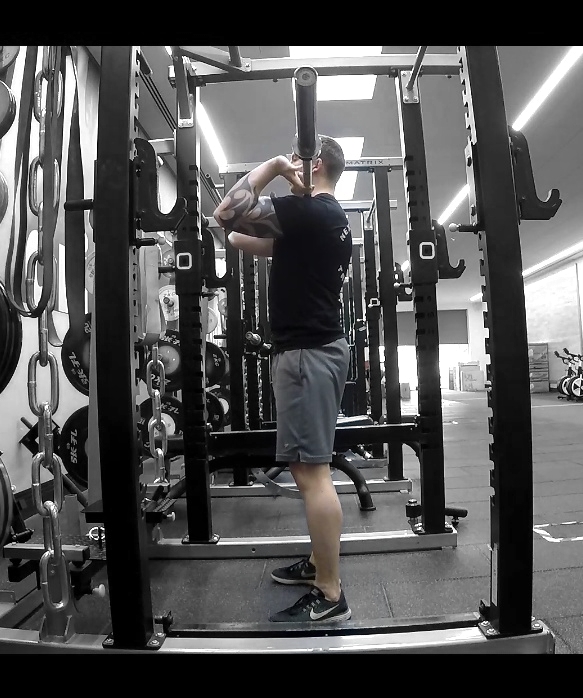
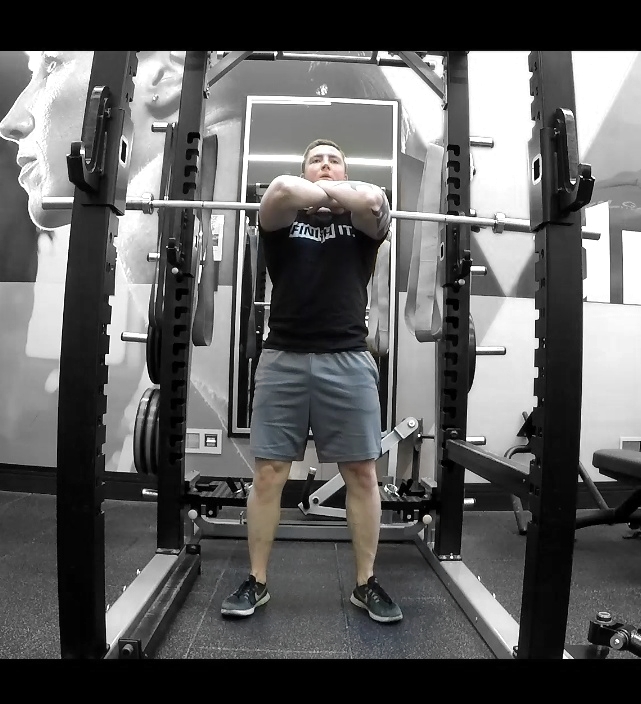
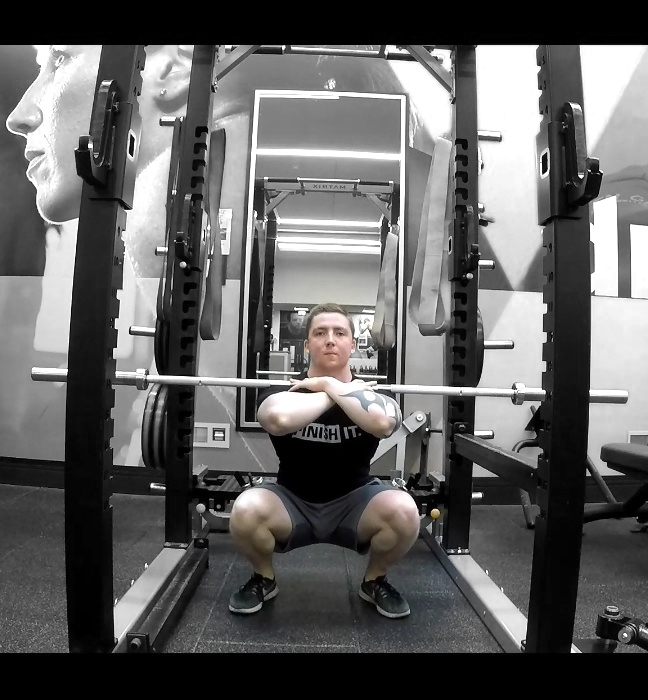
Front Squats
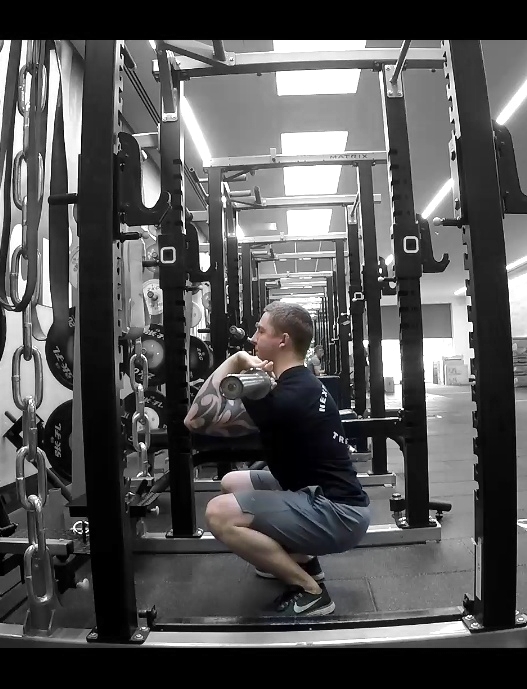
Like a back squat, but the bar is sitting on your front. To set up, try to sit the bar as far back as possible (may feel uncomfortable pressing on front of neck, but the closer we are to our midline the easier it will be to control the weight), balancing on your anterior delts/collar bones. Either have your arms crossed with hands on top of the bar (keep elbows high, parallel to floor) or fingers underneath bar with elbows straight out in front. Stand up, taking the bar out of the rack, take a deep breath, brace the core (while tightening all other muscles of your body), and descend into a squat, keeping the back upright and elbows high. Reach the bottom of the squat (femurs parallel to floor, ass to grass or whatever depth is most comfortable), then power back up into a standing position.
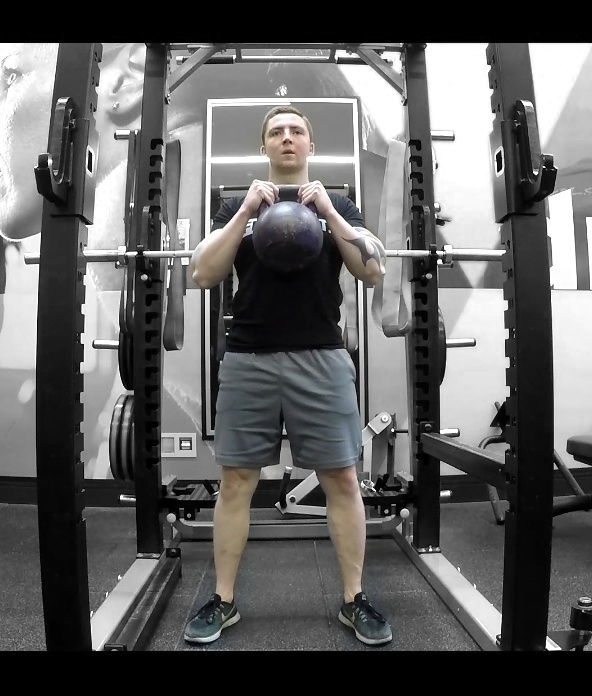
We can also perform a Goblet squat, using a kettlebell or dumbbell - here we keep the weight in our hands, held close to our chest.

Hammer Curls
These are bicep curls with the palms facing inwards (neutral grip), performed with dumbbells.
Hamstring Curl
This is the standard hamstring curl machine at the majority of gyms. Sit/lie down, making sure your knee has room to flex and the machine arm is sitting comfortably at the bottom of your lower leg (near where ankle meets shin). Flex your knees, pulling your feet and the machine arm towards your body as far as you can (aim for at least a 90 degree bend in knee). Control the machine arm back to the start position.
Hamstring Curl Eccentrics
Here we use both legs to bring the machine arm into a flexed knee position, then use one leg to control the machine arm back to the extended knee starting position. This will be with a heavier weight than we would normally use for a single leg hamstring curl, but start conservatively (using a slow eccentric) and build the weight up instead of jumping in with a huge weight.
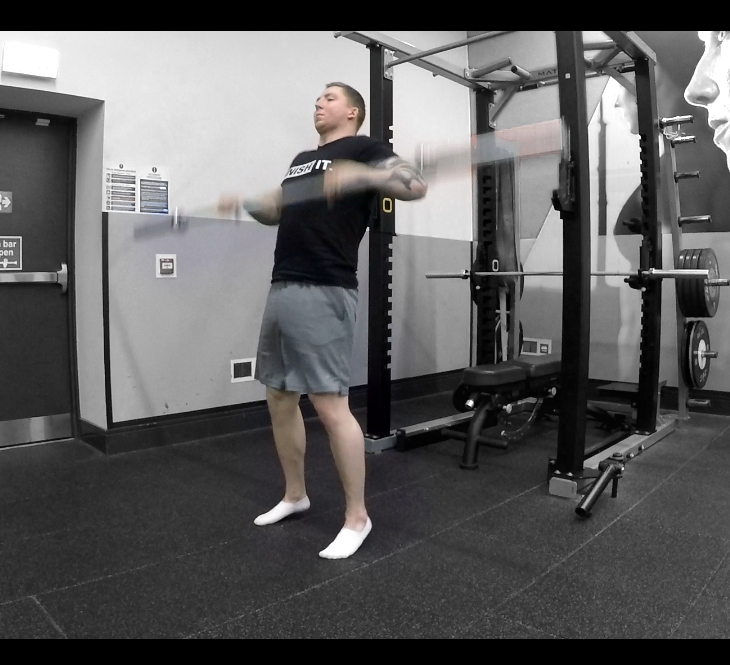
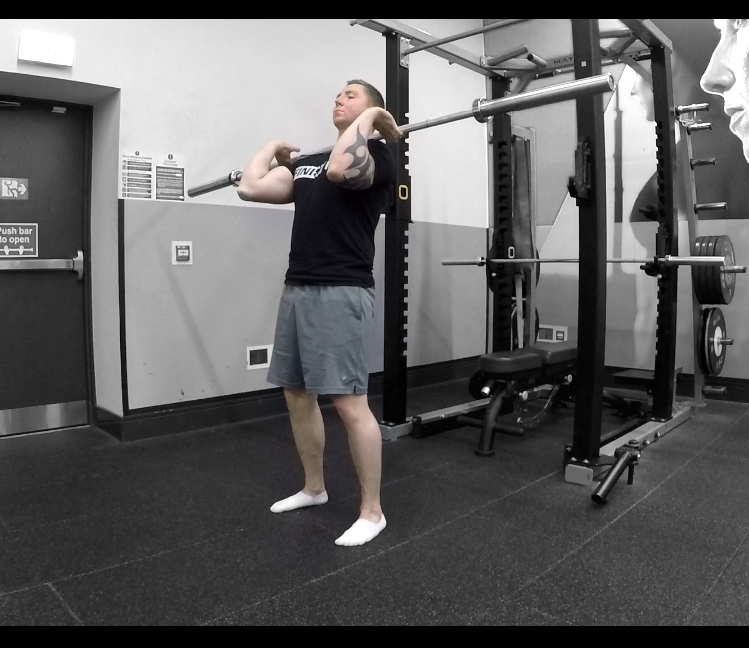
Hang Clean
Deadlift the bar to a standing position, from there begin to crouch down (like you’re about to jump), then explode up - driving your chest up, hips forward and yanking the bar up onto your shoulders. This is an explosive movement, so don’t worry about getting a massive weight on the bar - focus on SPEED. This can be done with a barbell or dumbbells (just be careful to avoid thumping yourself/eating the weight).

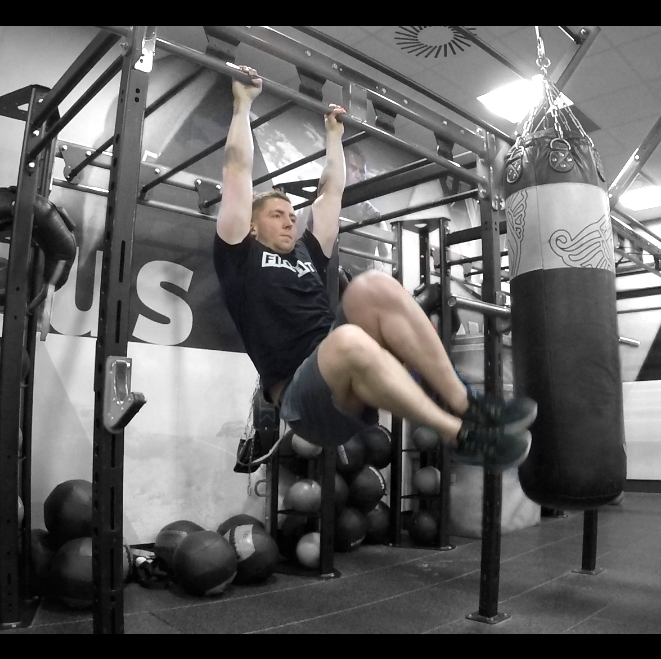
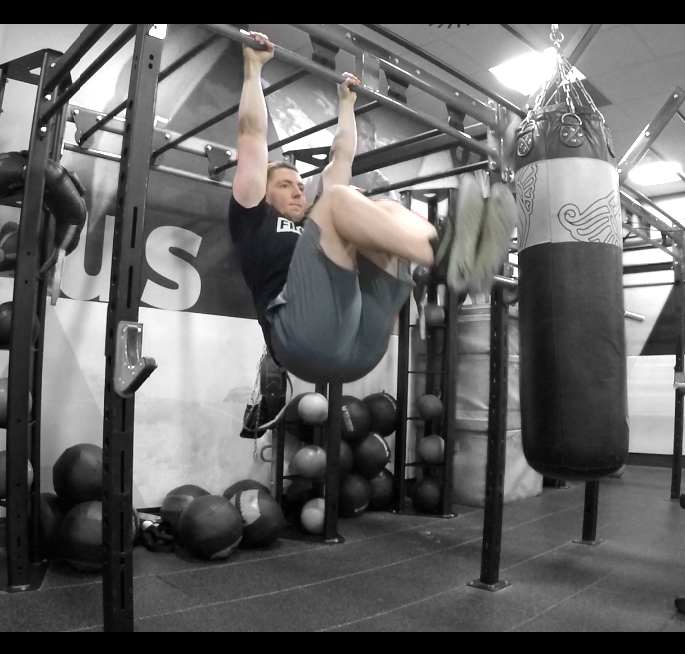
Hanging Knee Twists
Hanging from a bar, bring your knees up towards your chest then squeeze your oblique muscles to kick your feet out to one side (keeping legs fused together). Lower feet back down to start position, bring the knees back up and kick out to the other side to complete one rep.
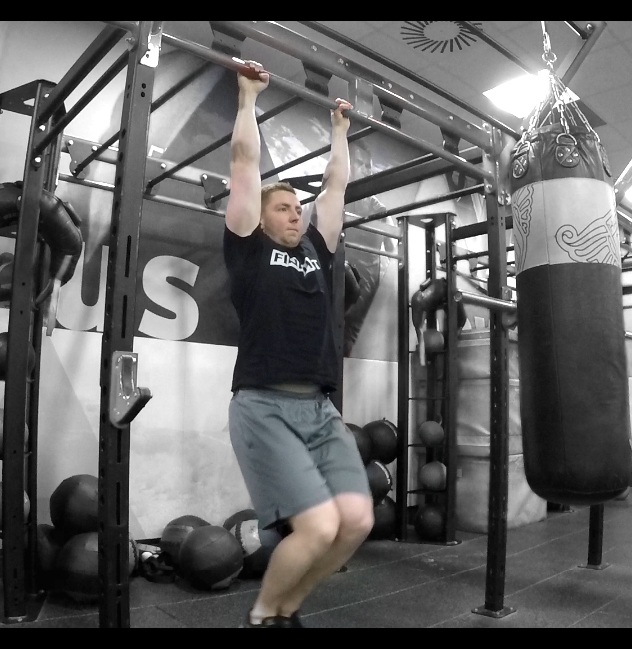
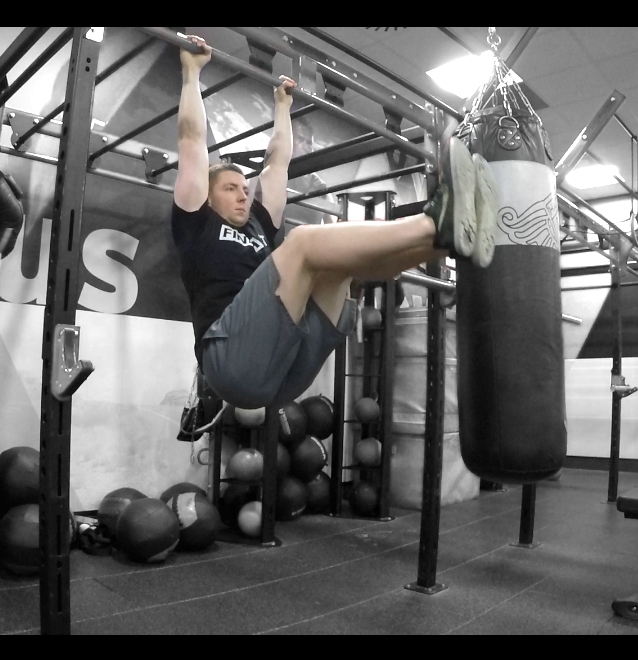
Hanging Leg Raises
Hanging from a bar, bring your knees up towards your chest, ideally past 90 degrees (as high as you can bring them, goal is to tilt the pelvis up to hit the abdominal muscles more than the hip flexors), then control them back down to minimise swinging. This can be made harder by keeping legs straight as possible (I’ve got rubbish hamstring flexibility, so this isn’t super straight by the top of the movement).

Leg Press (single leg)
This is using a standard leg press machine at the gym, but using only one leg. As the machine is fixed, balance is not an issue, so you don’t need to worry about getting your foot right in the middle of the platform - often where it sits when using two feet works fine for single leg pressing.
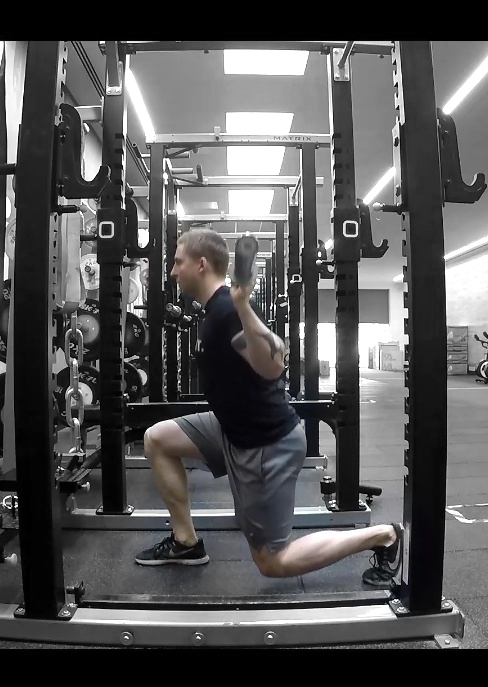
Lunges
Similar to a squat, set up with barbell on back or dumbbells in hands, then take a step forward, lowering rear knee to almost touch ground, then stand back up (bringing feet back together - not right next to each other, but in line). Take the next step with other foot. Can also be performed taking a step back then bringing rear foot forward, just depends on personal preference/what’s around you. Keep torso tight and upright throughout - make sure front knee doesn’t travel too far forward to keep strain off the joint (while it will hit the quads more, it won’t do us any favours for keeping our knees in good condition for running). If there is a stretch of gym space ahead, can also perform walking lunges - after the feet come together, take the next step forward. This exercise can be performed with barbell, dumbbells, or kettlebells.
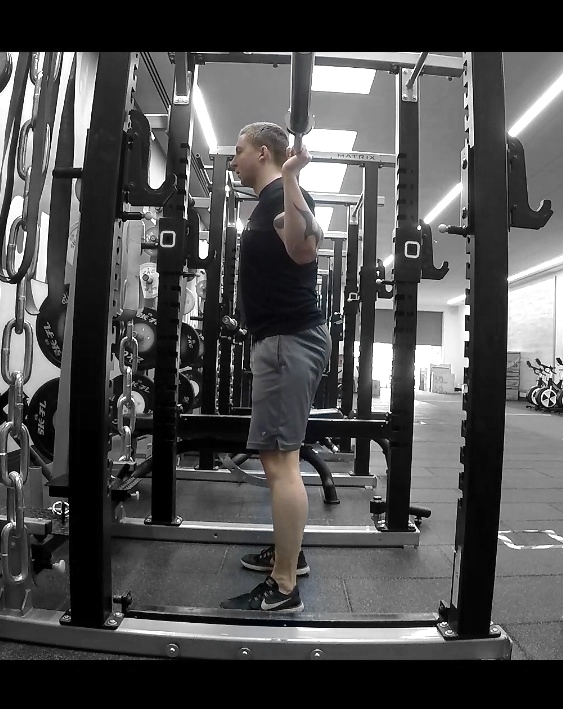
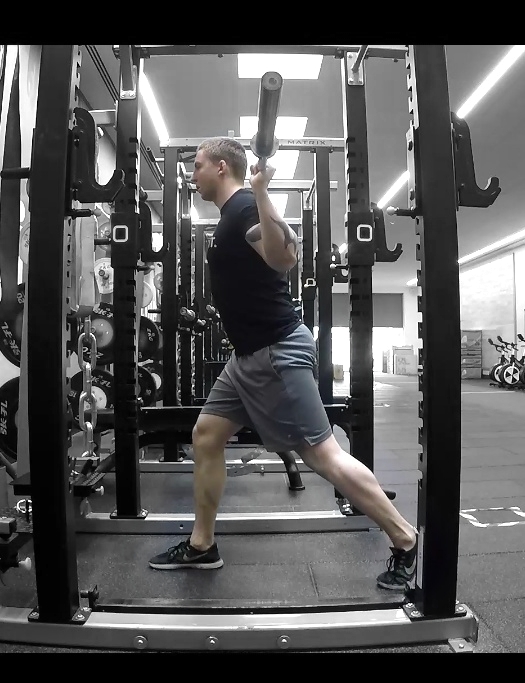


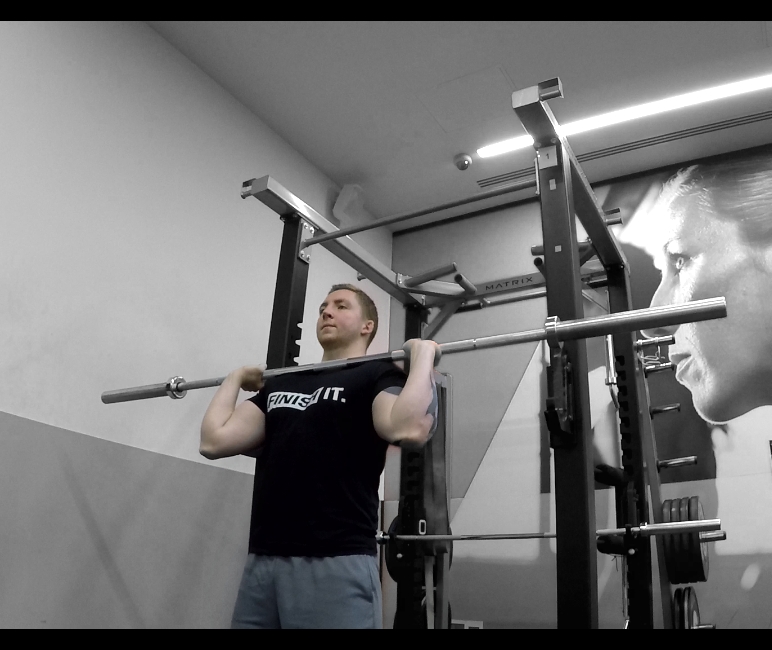
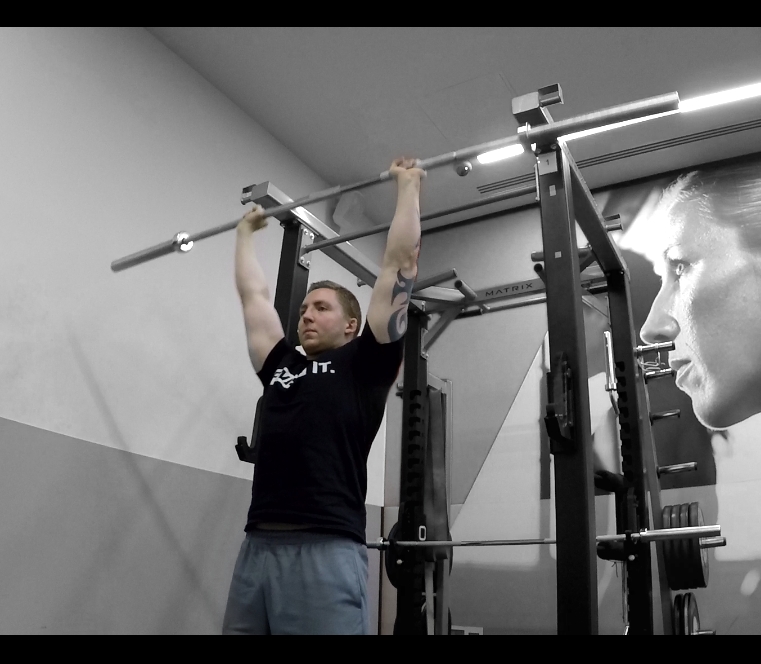
Overhead Press
Set rack to just under shoulder height, set feet in an athletic stance and grab the bar with hands about shoulder width apart. Get under the bar, with forearms perpendicular to floor (aiming straight up to ceiling), taking the weight in your hands/resting on anterior delts. Take a deep breath and brace, stand up and step back (bringing the bar out of the rack). Let the weight settle, take another deep breath, brace and extend arms to press bar overhead (make sure to tilt head back to get chin out of the way - the barbell is a poor shaving tool). Control weight back down to below chin (either to rest on anterior delts again or press from here - people with elbow troubles may want to avoid a big range of movement). This exercise can be performed with barbell or dumbbells/kettlebells (just need to clean or curl the weight up first).
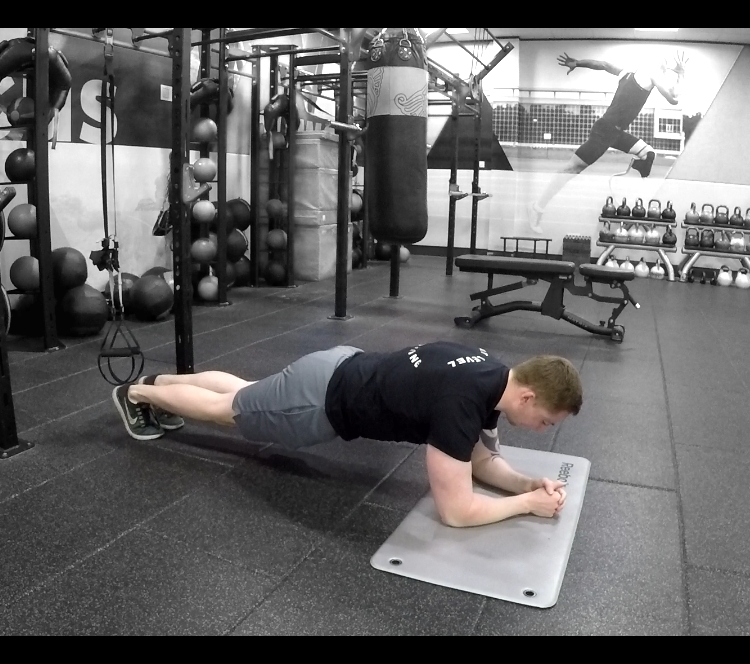
Plank
Kneeling on the ground, lean forward and let upper body rest on your forearms, then bring feet back to extend legs and balance on balls of your feet. From here aim to keep your body as straight as possible (squeezing your buttcheek muscles to prevent the back end rising up too much), keeping the core tight to avoid collapsing onto the ground. Hold for as long as possible. To make this easier, balance on hands (arms extended) like the start of a press up position, and to make harder pop the feet on something unstable or have feet pressed against a wall (off the floor).
Romanian Deadlifts
Similar to a regular deadlift, but the weight doesn’t touch the floor (aside from start and end of the set, unless you are a wizard). There are different ways to perform this, some will say stop when torso is parallel to floor, others when the bar reaches the top of the shin, but the best way is whatever is most comfortable. I recommend bringing the bar down to about mid shin, with slight bending of the legs (so it isn’t quite a full stiff leg deadlift), but if moving until your torso is about parallel to floor or keeping legs stiff feels more intuitive then roll with that. Deadlift the bar off the floor to get into a standing position, and this is where we start from. From here, lower the weight in a controlled manner to comfortable/desired level (don’t touch the floor), then bring the torso back up to a standing position to complete one rep. This exercise can be performed with barbell or dumbbells.

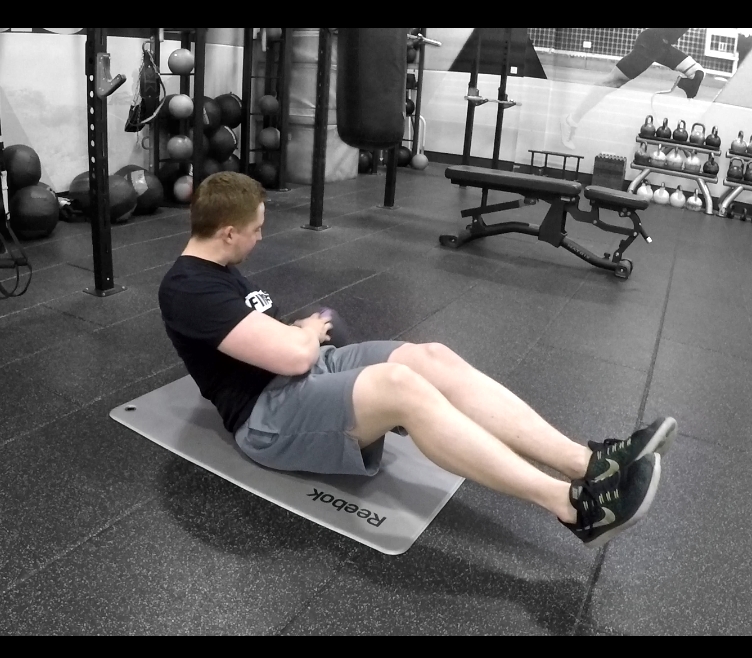
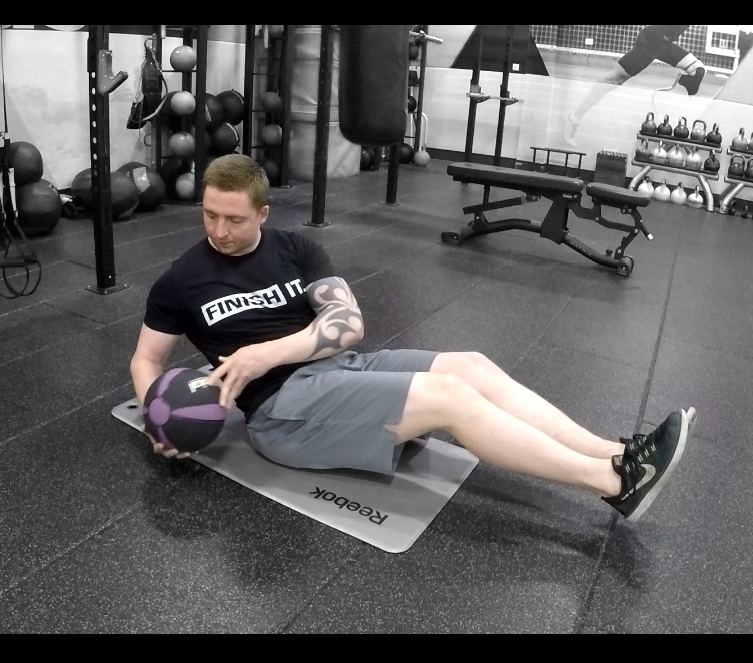
Russian Twists
Sitting on the ground holding a medicine ball, legs out in front, lean back slightly and rotate upper body to bring medicine ball to one side (don’t worry about stretching all the way around like an owl, stay within a comfortable range of motion). Squeeze the obliques to rotate the torso and bring the medicine ball to the other side to complete one rep. This can be made harder by keep feet up off the ground. This exercise can be performed with a medicine ball, slam ball, weight plate or kettlebell, but I find the medicine ball easiest to control.
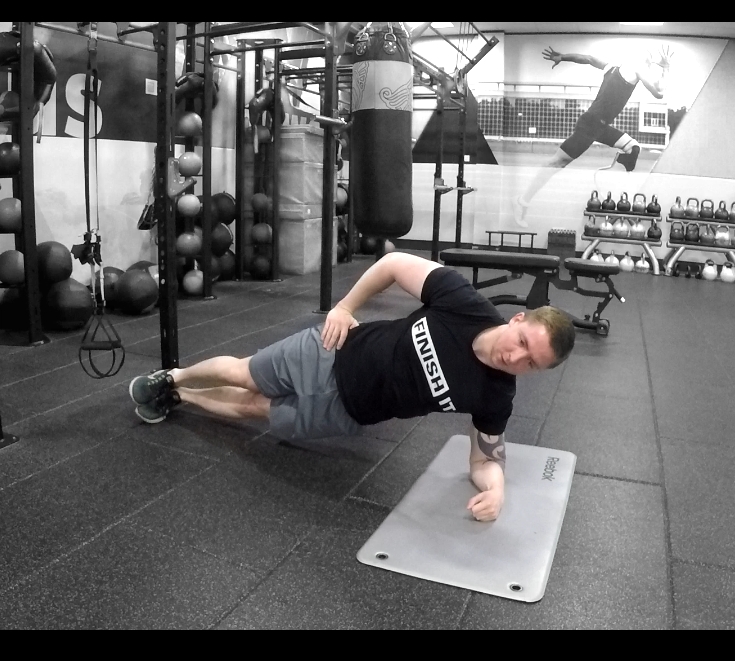
Side Plank
Similar to a plank, but now we’re on our side balancing on one arm. The other arm can sit on your side, be propped up like a tea pot handle, or in the air (like you just don’t care).
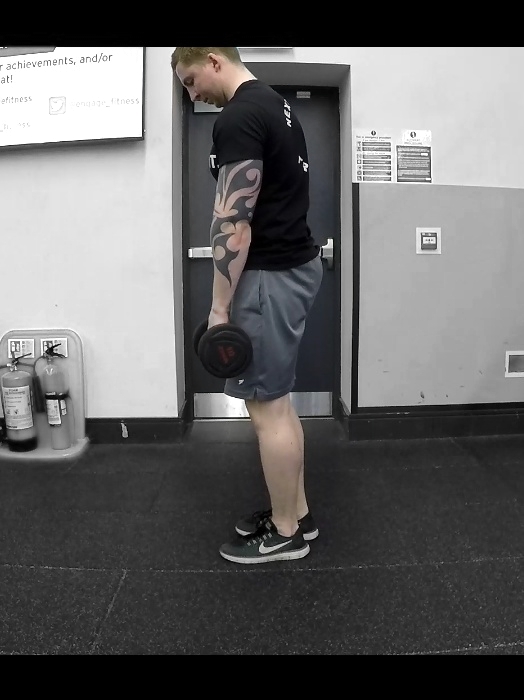
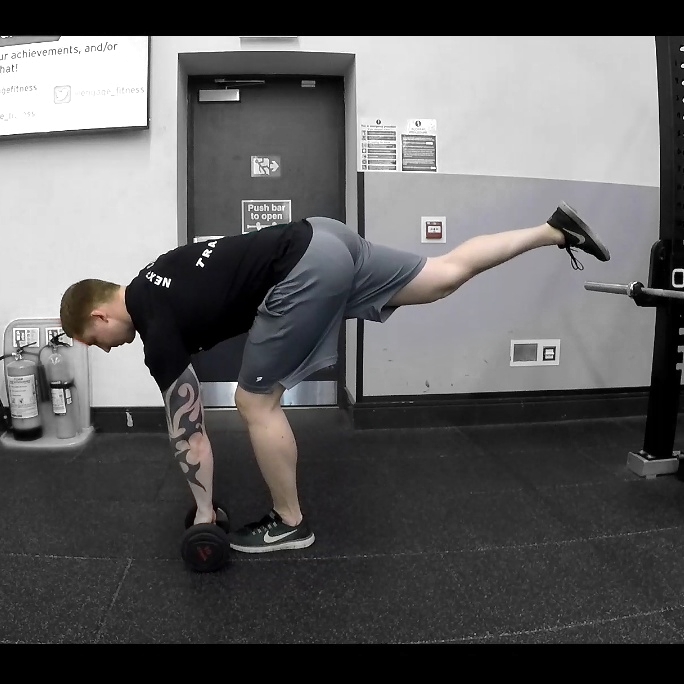
Single Leg Deadlifts
Similar to stiff leg deadlift, but balancing on one leg as the other moves behind as counterbalance to the torso. Flexibility may inhibit reach, if so can put dumbbell on a box or use a barbell with plates to bring the bar within reach. Complete reps one side at a time.
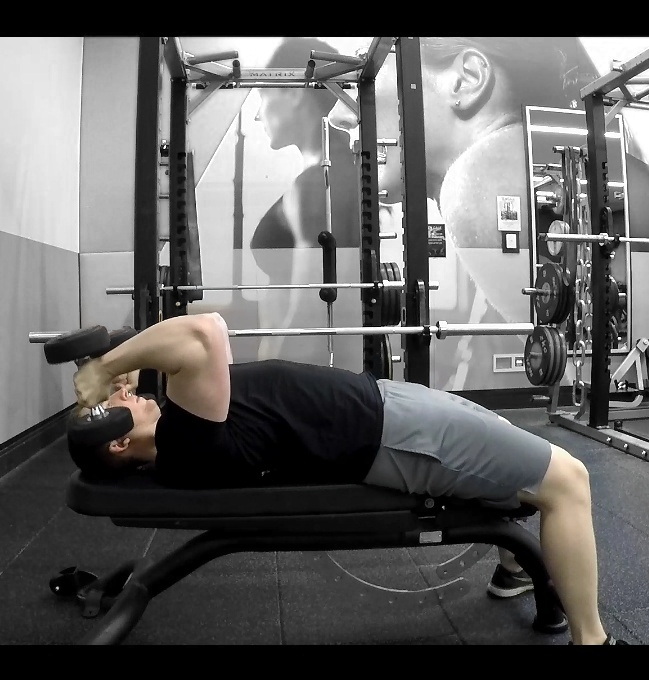
Skullcrushers
Set up as you would a dumbbell bench, having arms extended up above you (perpendicular to floor). From there, keep upper arms locked, bending elbows to bring dumbbells to side of head, then extend back to the start position. To make this harder, bring dumbbells behind head - upper arms angled up towards head, locking out with arms angled slightly towards head. This can be performed with dumbbells or barbell, but dumbbells will allow for better control of weight (getting in beside/behind head).
Split Squats
Set up as you would a squat, but take a step backwards to get into start position. Descend like a lunge, stopping just short of knee touching floor, and return to start position for one rep. Keep the core braced to maintain upright torso, and make sure the knee doesn’t travel too far forwards (this will put more emphasis on the quads, but also put more strain on the knee - something we want to minimise to keep the joint in good nick for running). Complete all reps before moving onto other side, can be performed using barbell on back or holding dumbbells/kettlebells.

Split Squats (unstable surface)
These are split squats with the front foot on an unstable surface (half bosu ball, wobble pad, etc). These are designed to work the ankle stability, so don’t worry about using weight here - if you do, I’d recommend using dumbbells that can be easily handled/safely dropped if you find yourself off balance.
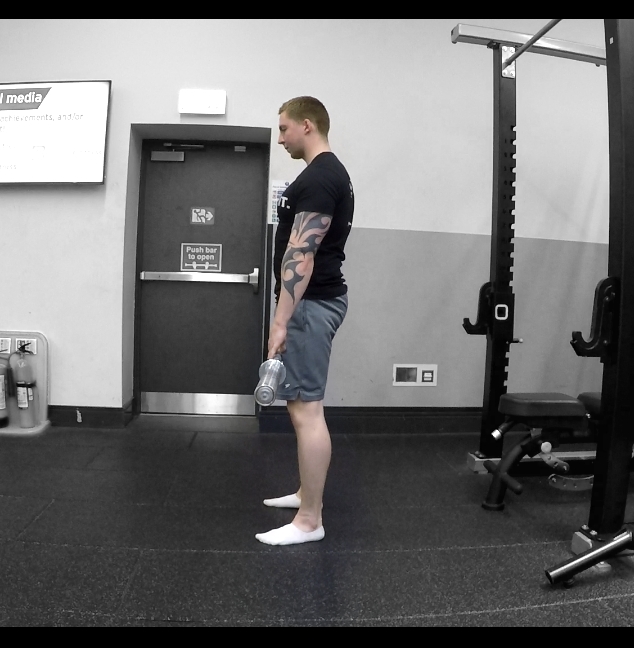
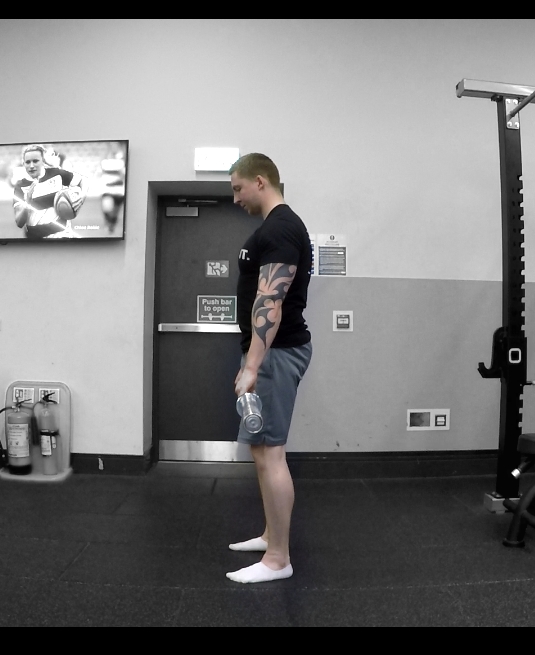
Stiff Leg Deadlifts
Similar to regular deadlift, but freeze the knees. Pick up the bar with a regular deadlift, then, keeping a slight bend in the knees, bend at the hip to lower the weight down while keeping your legs rigid. Lower the bar as far as you can (ideally touching the floor, but don’t worry if you can only make it part way with tight hamstrings), then bring your chest up and hips forward to bring the weight back into a standing position. Keep your back in a neutral position throughout, bracing the core as hard as you can. If you have poor hamstring flexibility, start with the weight raised on a box or other weight plates so you don’t have to travel as far. This exercise can be performed with barbell, dumbbells or kettlebells.

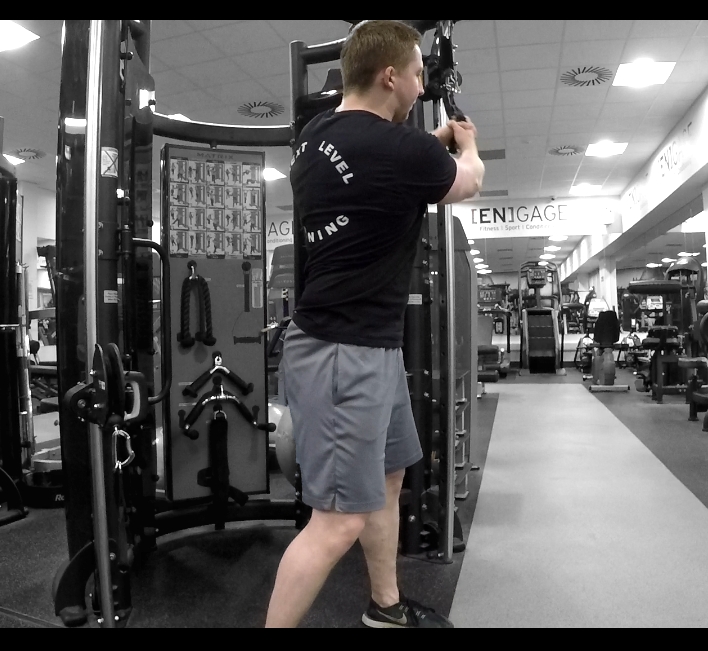
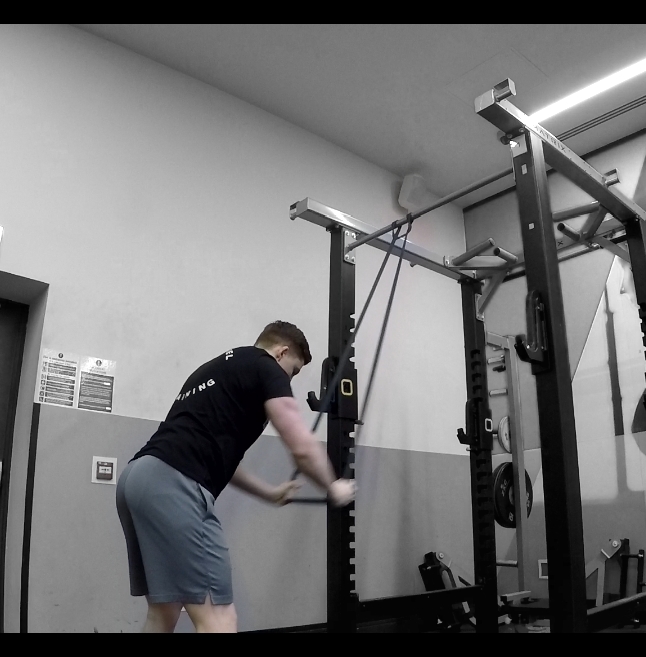
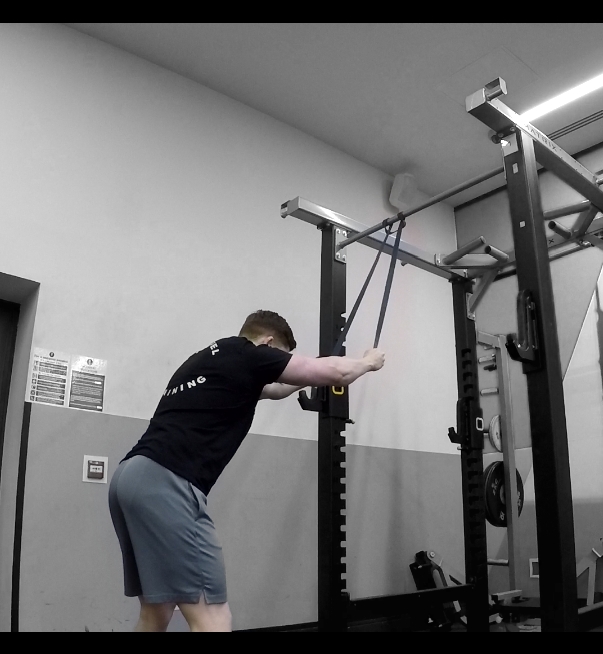
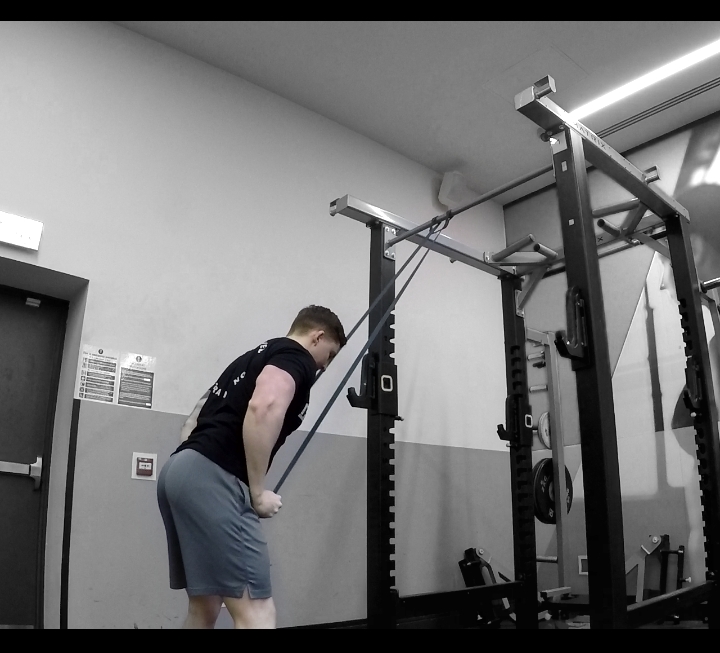
Straight Arm Lat Pulldown
Set up a cable rope attachment as if you’re beginning to get into position for a tricep pushdown - hold rope attachment, keeping arms straight (slight bend in elbow) and body rigid, and pull the rope down to your hips. Control back to start position for 1 rep.
This can be performed on cable machine (rope attachment works best) or by looping a resistance band around something stable.
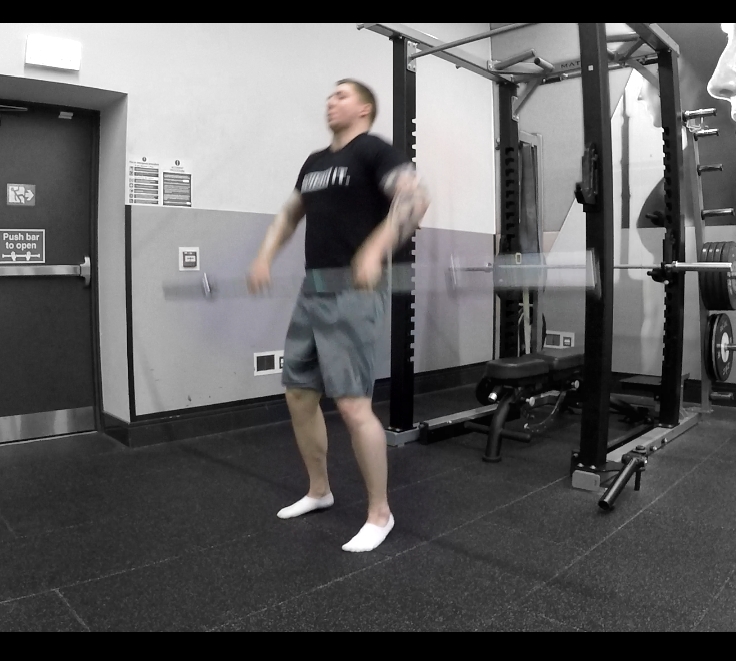
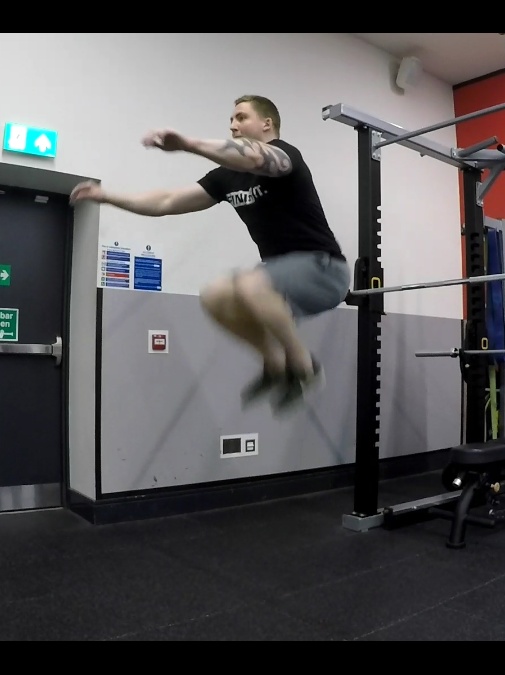
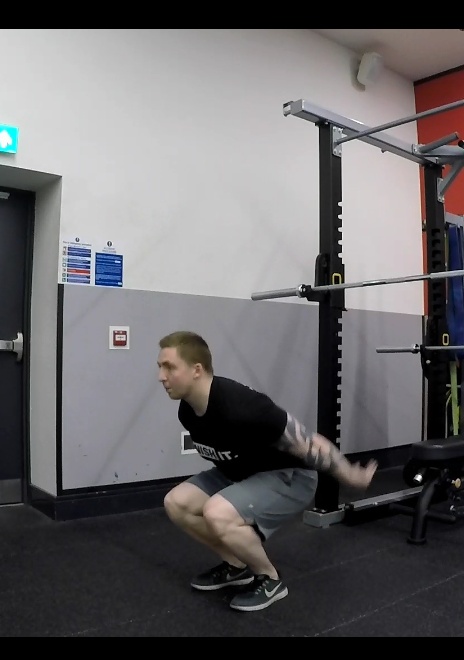
Tuck Jumps
Start with feet shoulder width apart, body in an athletic stance, then squat down while swinging arms back, then power arms forward/up, extend the hips/knees to jump and take off from the ground, leaving the Earth behind. While in the air, bring your knees up towards your chest, then extend upon re-entry into the atmosphere to land softly on the balls of your feet (legs acting like springs to bend and absorb impact of the ground).
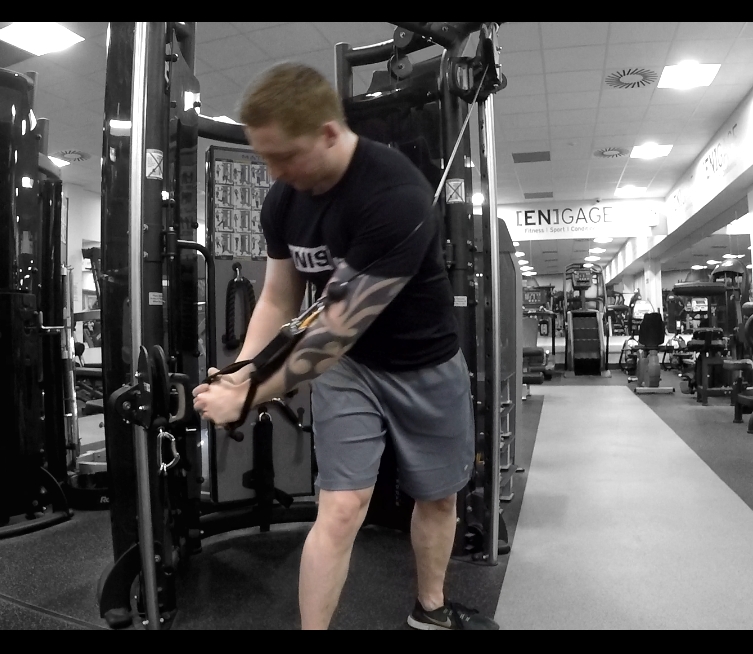
Woodchoppers
Set the cable attachment up high, stand side on with feet shoulder width apart and twist torso to grab the handle with both hands (arms held rigidly extended with slight bend in elbow). Keeping arms extended, squeeze the obliques to rotate the upper body, arcing the handle down diagonally to opposite side. Control weight back to start position, completing prescribed number of reps before turning around to perform reps on opposite side.